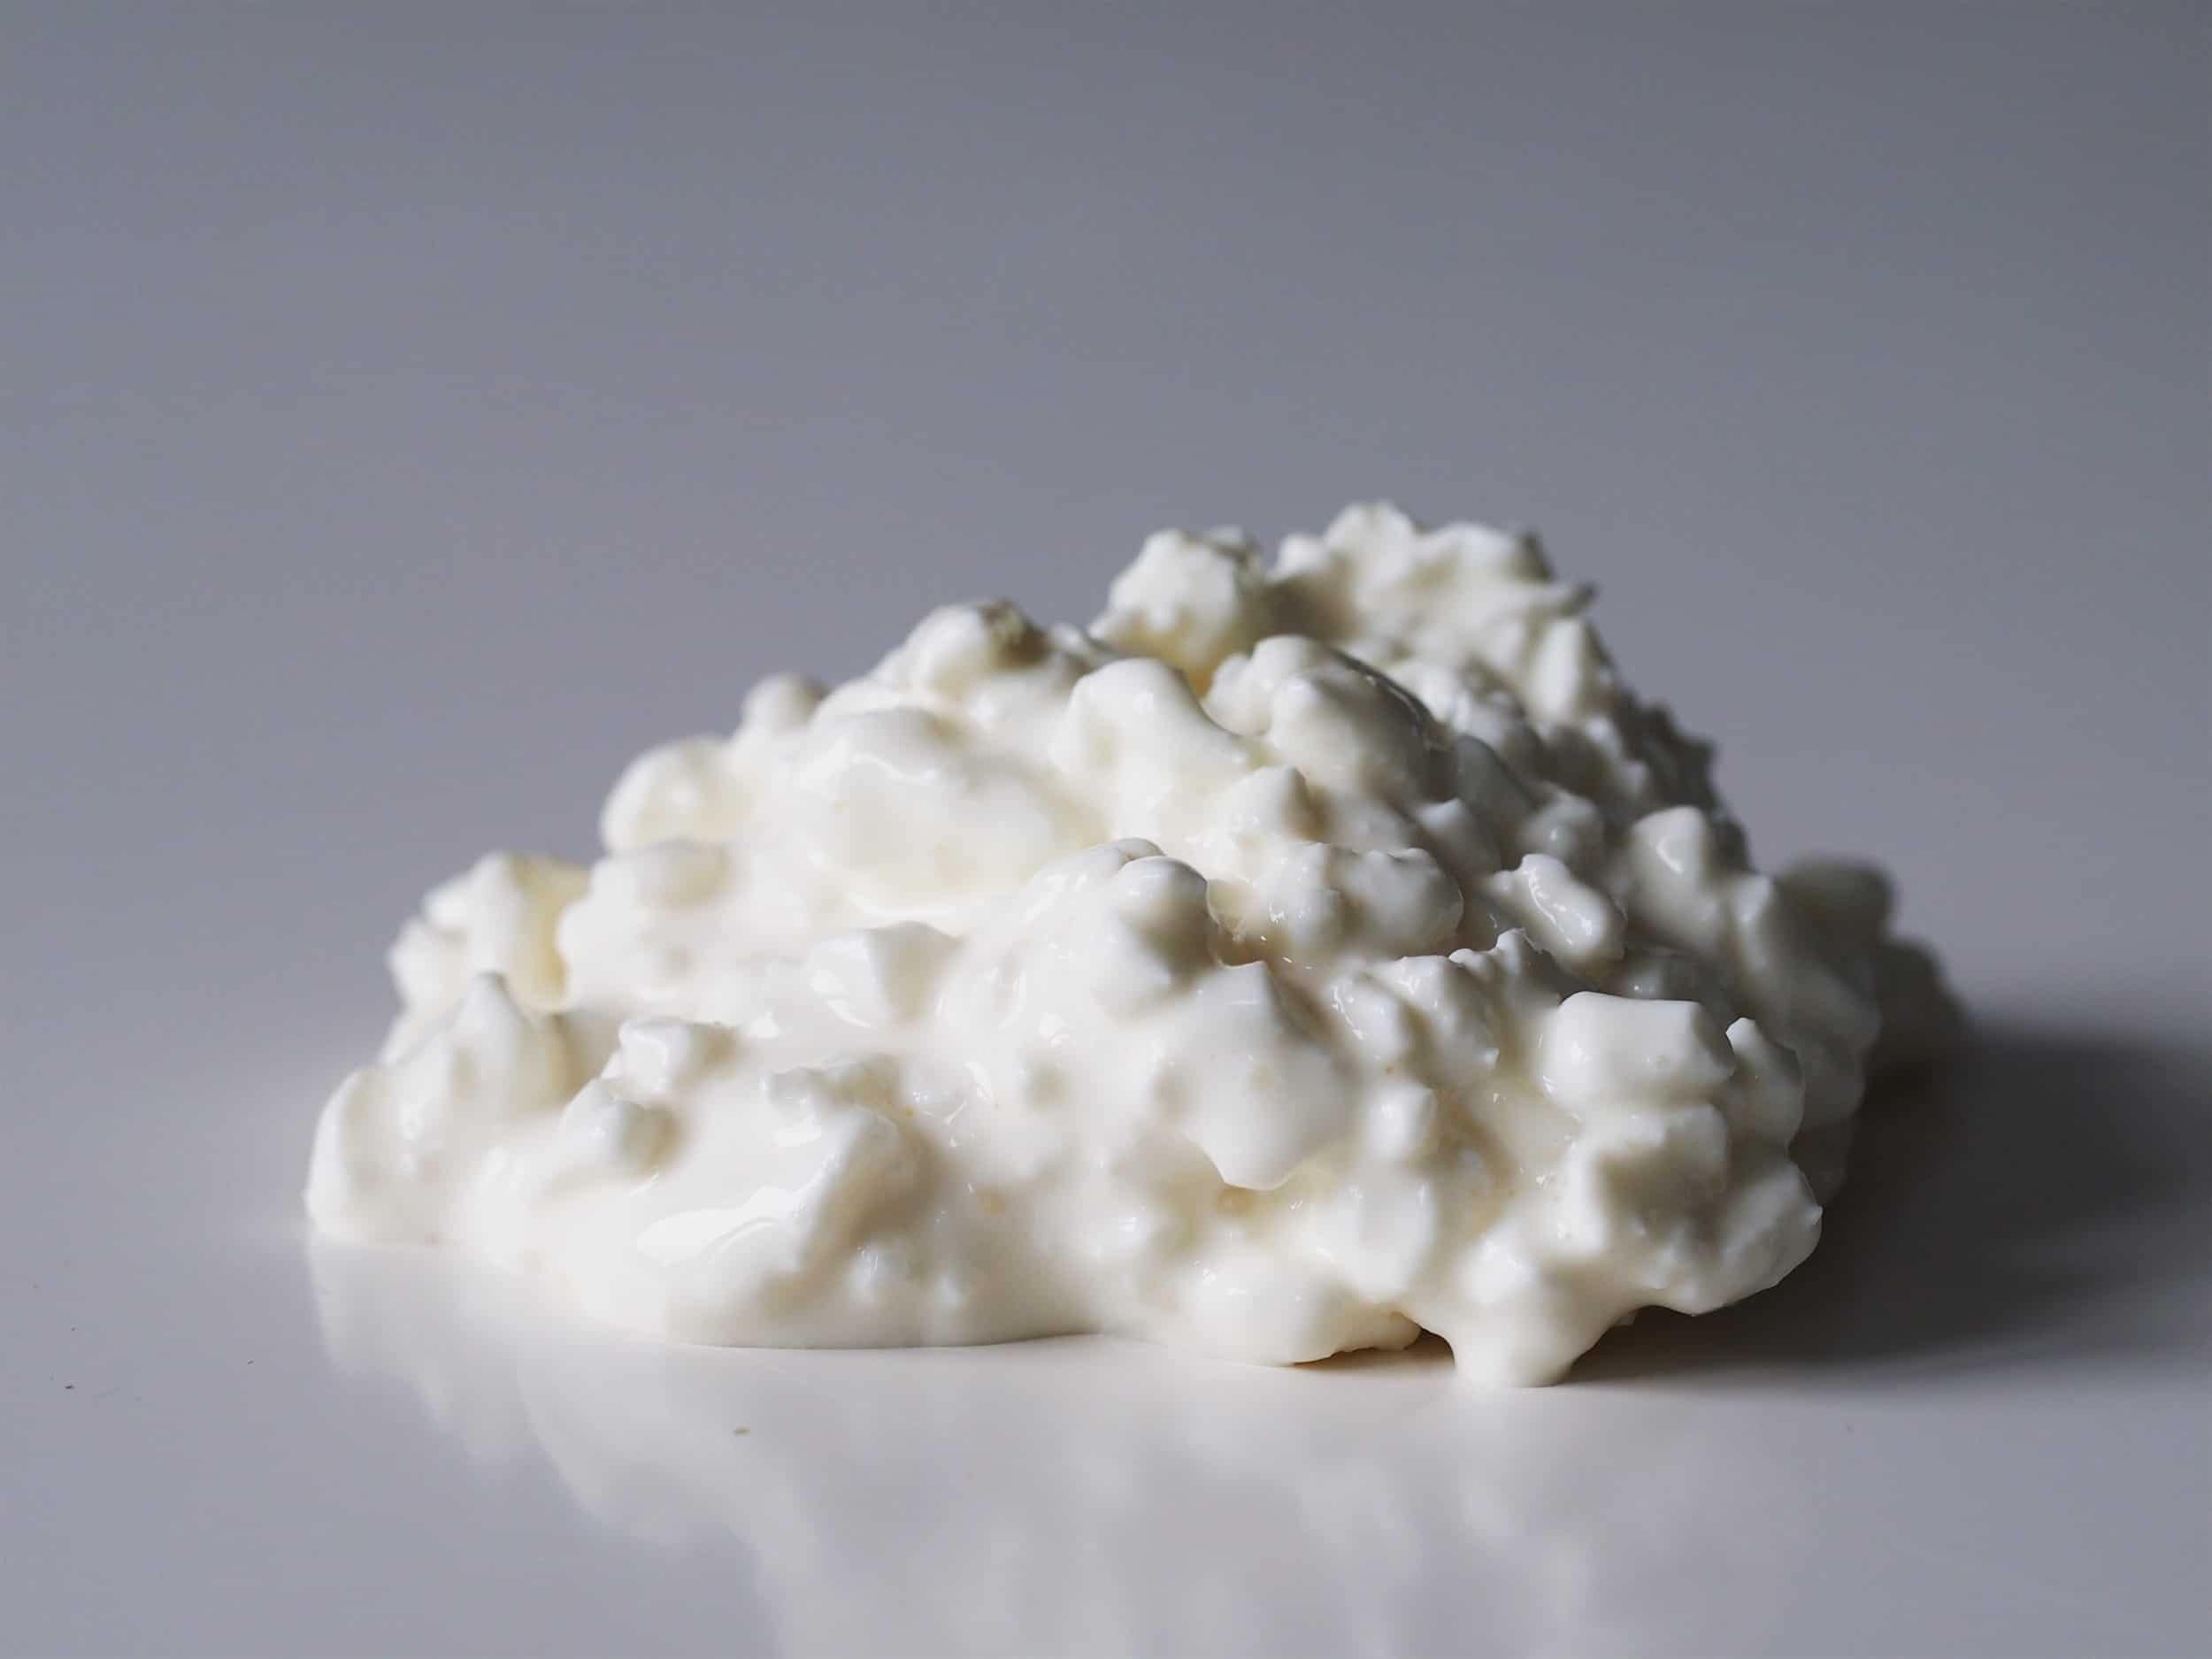
Ditch the Casein Shake – Why Cottage Cheese is the Ultimate Nighttime Protein
Think your nightly casein shake is supporting your health? Think again. Many protein powders contain harmful chemicals,heavy metals, and artificial additives that may do more harm than good. Cottage cheese, a natural source of casein, delivers slow-digesting protein along with essential vitamins and minerals—without the toxic load of ultra-processed powders. In this article, I reveal the hidden dangers of casein protein powders and share the ultimate bedtime snack for muscle recovery, sleep, and longevity.

If your nightly routine includes a casein protein shake, you might want to reconsider. While casein powder is known for its slow-digesting protein, it lacks the natural micronutrients that whole foods provide. Swapping your shake for a whole-food alternative like cottage cheese can enhance not just your recovery but also your overall health, sleep, and longevity. In this article, we’ll explore why cottage cheese outshines casein powder and why ultra-processed protein shakes may be doing more harm than good.
Casein Powder vs. Cottage Cheese – What’s the Difference?

Casein protein powder is an isolated protein source, often stripped of its natural vitamins and minerals. In contrast, cottage cheese is a whole food that delivers protein alongside essential micronutrients that support metabolism, immune health, and muscle recovery. Here’s what cottage cheese provides that casein powder doesn’t:
Calcium – Supports strong bones and muscle contractions.
Phosphorus – Aids in ATP production and cellular repair.
Selenium – A key antioxidant for thyroid function and immunity.
Vitamin B12 – Essential for brain health and red blood cell formation.
Riboflavin (B2) – Helps convert food into energy and reduces oxidative stress.
Zinc – Strengthens immune function and supports hormone production.
Potassium & Magnesium – Work together to regulate blood pressure and muscle function.
The Dangers of Ultra-Processed Protein Powders

Beyond the lack of essential micronutrients, many casein protein powders contain artificial additives, emulsifiers, and sweeteners that may negatively impact gut health and metabolic function. However, one of the biggest concerns with ultra-processed protein powders is the potential contamination with heavy metals like lead, arsenic, cadmium, and mercury.
Heavy Metal Contamination in Protein Powders
Independent testing by the Clean Label Project found that many protein powders - including casein, whey, and plant-based options - contained detectable levels of heavy metals, with some exceeding safe consumption limits. A more recent 2025 study confirmed that nearly half of all tested protein powders contained lead, while organic plant-based powders had some of the highest levels of arsenic and cadmium.
These toxic metals can accumulate in the body over time, leading to serious health risks, including:
Neurological damage (lead and mercury exposure)
Kidney and liver strain (cadmium buildup)
Increased cancer risk (long-term arsenic exposure)
Disrupted hormone function
One reason for this contamination is that casein powders undergo significant processing, stripping them of natural nutrients while exposing them to potential contaminants during manufacturing. Unlike whole foods like cottage cheese, which are minimally processed and rigorously regulated, protein powders often lack the same level of oversight.
Artificial Additives & Gut Health Risks
Many casein protein powders also contain artificial flavours, gums, and emulsifiers designed to improve texture and mixability. Research suggests that emulsifiers such as polysorbate-80 and carrageenan may contribute to gut inflammation, altered microbiome balance, and even insulin resistance.
By choosing a whole-food alternative like cottage cheese, you’re not just getting slow-digesting protein for muscle recovery -you’re also avoiding unnecessary exposure to contaminants and artificial additives that could harm your long-term health.
A Better Bedtime Snack for Recovery, Sleep & Longevity
Instead of reaching for a processed shake, try this nutrient-dense bedtime snack, which provides slow-digesting protein, healthy fats, and sleep-enhancing compounds:
My Go-To Bedtime Snack:

200g fat-free cottage cheese – A natural source of casein protein and micronutrients.
½ tsp Ceylon cinnamon & a pinch of grated nutmeg – Helps stabilise blood sugar and adds natural warmth.
Homemade seeded wholemeal or rye bread – Provides fibre for digestion and slow-release energy.
30g walnuts – A great source of omega-3s and melatonin for better sleep.
¼ tsp glycine powder – Aids relaxation and improves sleep quality.
½ tsp Manuka honey – A natural sweetener with antibacterial properties.
A mug of decaf black tea – Contains L-theanine, which promotes relaxation, and theaflavins & thearubigins, which help regulate blood sugar and support metabolic health.
Conclusion
Swapping your nightly casein shake for a whole-food option like cottage cheese offers far more health benefits, from improved sleep and muscle recovery to better long-term metabolic health. Plus, avoiding ultra-processed protein powders helps reduce your intake of artificial additives that may be harming your body.
Ready to upgrade your nighttime nutrition? Try this whole-food bedtime snack and see the difference in your recovery, sleep, and energy. Let me know how it works for you!
Further Reading
Want to learn more about the risks of ultra-processed protein powders and bars? Check out my article: Is Your Protein Shake Killing You? The Truth About Ultra-Processed Protein Powders and Bars.
Coming soon: Are Protein Powders Safe? Heavy Metal Contamination & How to Avoid It. In this article, I’ll uncover the hidden risks of heavy metals in protein powders and share how to choose a cleaner, safer alternative.

The Ultimate Guide to Homemade Peanut Butter: Boosting Resveratrol Naturally
Did you know you can naturally boost the anti-ageing benefits of peanut butter?
This guide reveals how to make your own peanut butter while maximizing its resveratrol content—a powerful antioxidant linked to longevity, heart health, and glowing skin.
Learn the best peanut varieties, whether to boil or roast, and how to store your homemade spread for maximum nutrition.
Once you try this nutrient-packed recipe, you’ll never go back to store-bought!

Peanut butter is a staple in many households, loved for its creamy texture, rich flavour, and high protein content. But did you know that by making it yourself, you can significantly boost its resveratrol content—enhancing its anti-aging and heart-health benefits?
Homemade peanut butter is one of the easiest and healthiest spreads you can make. Not only does it taste richer and fresher than store-bought versions, but it also lets you avoid additives, unnecessary oils, and excess sugar.
This guide will walk you through how to maximize resveratrol in homemade peanut butter. You’ll also discover:
✔ The science behind peanuts and resveratrol
✔ Delicious ways to enjoy peanut butter beyond toast
✔ Storage tips to maintain freshness and nutritional value
If you’re making my homemade bread recipe, this peanut butter pairs perfectly—especially when complemented with my homemade jam recipe.
The Science Behind Peanuts & Resveratrol
What is Resveratrol?

Resveratrol is a polyphenolic compound found in certain plants, including peanuts. It’s renowned for its potential to:
✔ Combat oxidative stress and slow cellular aging
✔ Enhance heart health by supporting circulation
✔ Reduce inflammation and protect against chronic diseases
How to Maximize Resveratrol in Peanut Butter
Not all peanut butter is created equal in terms of resveratrol content. Here are the 3 biggest factors that impact its levels:
1️⃣ Peanut Variety Matters

Valencia peanuts have three or more kernels per pod, with a naturally sweet flavour. This makes them ideal for sweeter peanut butter - but not the best for the highest resveratrol content.
Resveratrol concentrations vary among peanut types:
Spanish peanuts: Contain higher resveratrol levels, ranging from 1.7 to 3.7 µg/g, making them an excellent choice for homemade peanut butter.
Runner peanuts: Commonly used in commercial peanut butter. These have lower resveratrol content.
Valencia peanuts: Known for their natural sweetness but possess lower resveratrol levels.
2️⃣ Raw, Roasted, Boiled or Sprouted?
The resveratrol content in peanuts varies significantly based on processing methods:
Raw Peanuts: Resveratrol levels in raw peanuts are relatively low, typically ranging from 0.01 to 0.26 micrograms per gram (µg/g).
Roasted Peanuts: Roasting enhances flavor but can reduce resveratrol content. Studies have reported resveratrol concentrations in roasted peanuts between 0.02 and 0.08 µg/g. Another study found that roasting led to resveratrol losses ranging from 6% to 88%, depending on the peanut variety.
Boiled Peanuts: Boiling appears to increase resveratrol levels. Research indicates that boiled peanuts contain resveratrol concentrations ranging from 1.8 to 7.87 µg/g, which are comparable to levels found in red wines. Another study reported that boiled peanuts had a resveratrol content of 5.138 ± 2.849 µg/g, while roasted peanuts had 0.055 ± 0.023 µg/g.
Sprouted (Germinated) Peanuts: Germination significantly enhances resveratrol content. Research has shown that germinated peanuts have resveratrol levels ranging from 11.7 to 25.7 µg/g, depending on the peanut cultivar. Another study found that the trans-resveratrol content of peanut variety Silihei increased by 3070% during germination, reaching 631 ng/g (0.631 µg/g) on the 8th day.
Put simply, processing methods significantly impact the resveratrol content in peanuts. Boiling and germination (sprouting) notably increase resveratrol levels, while roasting may lead to substantial losses.

Consider other benefits of sprouting: reducing anti-nutrients for better digestion and increasing the bioavailability of vitamins!
3️⃣ Skins On or Off?
Most of the resveratrol is found in peanut skins! Keeping them on boosts the antioxidant content.
Peanut skins also contain other antioxidants, like procyanidins and catechin, which support heart health, reduce inflammation, and help protect cells from oxidative stress—further enhancing their nutritional value.
In summary, by selecting Spanish peanuts, keeping the skins on, sprouting, then opting for boiling over roasting, you can create peanut butter that’s both delicious and rich in resveratrol.
Best Peanuts for Homemade Peanut Butter
The choice of peanuts influences the taste, texture, and nutritional profile of your peanut butter.
✔ Best for Resveratrol: Spanish Peanuts
✔ Best for Sweetness: Valencia Peanuts
✔ Best for Creamy Texture: Runner Peanuts
How to Identify Peanut Varieties by Kernel Count

Peanut varieties can often be distinguished by the number of kernels per pod:
Runner peanuts – Typically have two kernels per pod and are the go-to choice for creamy peanut butter. They are commonly used in commercial peanut butter due to their sweet flavor and excellent roasting qualities.
Virginia peanuts – Usually contain two large kernels per pod. Prized for their exceptional size and crunch, they offer a sweet, nutty flavor and are often used for gourmet roasted peanuts and snacks.
Spanish peanuts – Often have two or three smaller kernels per pod. Known for their pronounced nutty flavor, they are naturally higher in oil and resveratrol, making them ideal for rich, flavorful peanut butter.
Valencia peanuts – Typically contain three or more kernels per pod. They are the sweetest variety, even more so than runner peanuts, making them perfect for boiling or naturally sweeter peanut butter.
By understanding peanut varieties, you can choose the best option based on flavour, texture, and nutrition—ensuring your homemade peanut butter is as delicious and nutrient-packed as possible.
Organic vs. Non-Organic Peanuts
Peanuts are often grown with pesticides and fungicides, which can linger in the final product. If possible, choose organic, raw Spanish peanuts.
Resveratrol-Rich Peanut Butter
Ingredients:
250g raw, red-skinned peanuts -preferably Spanish
Filtered water (for sprouting)
½ tsp sea salt (optional)
1 tsp monk fruit sweetener, stevia or xylitol (optional)
1 tbsp warm water or peanut oil (for smoother texture, optional)
Instructions
Step 1: Sprouting the Peanuts
Rinse the raw peanuts thoroughly and place them in a bowl.
Cover with filtered water and soak for 12 hours.
Drain, rinse, and transfer to a damp cloth or sprouting jar.
Let them sit at room temperature for 2–3 days, rinsing twice daily, until small sprouts appear.
Step 2: Boiling for Maximum Resveratrol
Transfer the sprouted peanuts to a pot of boiling water.
Boil for 30 minutes to enhance resveratrol and reduce anti-nutrients.
Drain and let them cool slightly.
Step 3: Blending into Peanut Butter
Add the boiled peanuts to a food processor.
Blend for 2 minutes until a thick paste forms.
Add sea salt, sweetener, or warm water/oil for desired consistency.
Continue blending for another 2–3 minutes until smooth and creamy.

Stay tuned for my top picks of food processors for making peanut butter in my next blog – The Power of Resveratrol: How It Boosts Longevity, Heart Health & More.
Step 4: Storing
Transfer to a clean, airtight jar.
Store in the fridge for up to one month.
Stir before each use, as natural oils may separate.

Delicious Ways to Enjoy Your Enhanced Peanut Butter
Beyond the classic spread on toast, consider these creative uses:
Smoothies: Blend into smoothies for added protein and flavor.
Baking: Incorporate into cookies, muffins, or energy bars.
Sauces: Use as a base for savory sauces in dishes like satay.
Dips: Mix with yogurt and honey for a quick fruit dip.
Experimenting with these ideas can elevate your culinary creations while providing the health benefits of resveratrol-rich peanut butter.
Pairing Peanut Butter with Homemade Bread

When paired with whole grain and non-UPF (Ultra-Processed Food) bread, a peanut butter sandwich can be a healthy meal. Whole grain bread provides fibre, vitamins, and minerals, while non-UPF bread is typically free of additives, preservatives, and refined sugars found in more processed breads. Combined with peanut butter, which – in addition to resveratrol – offers healthy fats, protein, and essential nutrients like vitamin E and magnesium, the sandwich becomes a balanced, nutritious option.
Peanut butter isn’t just a delicious spread—it also helps create a complete protein when paired with grains.
✔ Peanuts = a legume (rich in lysine)
✔ Bread = a grain (rich in methionine)
Together, they provide all 9 essential amino acids, making them great for muscle recovery and satiety—perfect for anyone training or trying to stay lean.
Try it with my homemade bread and jam recipe for a low-GI PB&J alternative!

More Ways to Enjoy Peanut Butter
Peanut Butter & Cinnamon Protein Oatmeal

You can top your oatmeal with sliced bananas.
✔ 40g oat groats (soaked overnight)
✔ 1 tbsp homemade peanut butter
✔ ½ tsp cinnamon
✔ 1 tsp chicory root syrup (optional)
✔ 100ml plant-based milk
✨ Why it’s great:
Slow-digesting carbs + protein + healthy fats = steady energy with no sugar crash.
Peanut butter completes the protein in oatmeal, since peanuts are a legume and oats are a grain—together, they form a complete amino acid profile!
Peanut Butter & Cacao Smoothie

✔ 1 frozen banana
✔ 1 tbsp homemade peanut butter
✔ 1 tsp cacao powder
✔ 200ml almond milk
✔ Ice cubes
✨ Why it’s great:
A post-workout recovery drink packed with protein, healthy fats, and antioxidants.
Making Peanut Butter Even More Anti-Ageing
Want to make your peanut butter even better for skin and longevity? Try adding:
✔ Cinnamon → Helps with blood sugar balance and reduces glycation (protecting collagen).
✔ Chia or flaxseeds → Adds omega-3s for skin hydration and elasticity.
✔ A dash of cacao → Extra antioxidants to fight oxidative stress.
✨ Tip:
Just stir them into your peanut butter before spreading, or blend them in during the process!
Storage Tips to Maintain Freshness and Nutritional Value
Proper storage is crucial to preserve the quality and nutritional benefits of your homemade peanut butter:
Temperature: Store peanut butter at cooler temperatures to maintain its quality. Research shows that storing at 10°C provides superior oxidative stability, with peroxide values peaking at 2.5 meq peroxide/kg, compared to higher values at elevated temperatures.
Container: Use airtight containers to prevent oxidation and moisture from entering, which can degrade the peanut butter’s quality.
Duration: Consume homemade peanut butter within a reasonable timeframe to enjoy its optimal flavour and nutritional benefits:
✔ At Room Temperature: Up to 3 weeks (cool, dark place).
✔ In the Fridge: 2–3 months (thicker texture).
✔ In the Freezer: Up to 6 months (thaw before use).
✨ Tip:
Always use a clean, dry spoon to prevent contamination!
Allergy Considerations
Peanuts are a common allergen. If you’re serving others, always:
Clearly label peanut-containing foods.
Be aware of cross-contamination risks in your kitchen.
Consider providing alternative spreads, such as almond or sunflower seed butter, for those with peanut allergies.
By being mindful of these factors, you can ensure that your homemade peanut butter is safe and enjoyable for everyone.
Conclusion
Making your own peanut butter is super-easy, and the health benefits are huge—especially when using Spanish peanuts, skins on, sprouting and boiling for extra resveratrol.
Further Reading:
Blueberry and Strawberry Chia Seed Spreads: Delicious and Healthy Jam Recipes
Is Your Protein Shake Killing You? The Truth About Ultra-Processed Protein Powders and Bars
Unlocking the Power of NMNH: Anti-Ageing, Strength, and Glowing Skin
In my next blog, The Power of Resveratrol: How It Boosts Longevity, Heart Health & More, I’ll share my top picks for food processors for making nut butters. Plus, you'll discover more about resveratrol, including:
Additional sources of resveratrol
A deeper dive into resveratrol’s health benefits
My lean and clean Resveratrol Power Bars recipe

Soup-er Healthy: A Next-Level Upgrade to Broccoli & Cheese Soup
What if your comforting bowl of broccoli and cheese soup could do more than just taste good? In this post, I take on the challenge of transforming a classic high-protein soup into a cleaner, leaner, and more powerful meal—boosting its anti-ageing, muscle-building, and antioxidant potential. I’ll explain why I swapped out dairy, added selenium-rich ingredients, and paired broccoli with tomatoes for maximum health benefits. Ready for a ‘soup-er’ healthy upgrade? Let’s dive in!
When a friend sent me a high-protein broccoli and cheddar soup recipe, they challenged me to “Venus-ise” it—meaning make it cleaner, healthier, and better for both anti-ageing and body composition. I was excited to take on this challenge because while the original was packed with protein, it included dairy-heavy ingredients like cheddar, cottage cheese, and heavy cream.
And while I love a creamy, comforting soup, dairy can actually block antioxidant absorption, meaning all the powerful benefits of broccoli would be lost! Plus, cheese isn’t ideal for anyone wanting to stay lean and defined, as the saturated fat in it can lead to subcutaneous fat hiding muscle definition. So, I set out to rework the recipe—keeping it high-protein and delicious while optimizing it for maximum health and physique benefits.
The Smart Swaps & Why They Matter
1. No Dairy = Maximum Antioxidant Absorption
Broccoli is a powerhouse of antioxidants, but dairy blocks them from being absorbed. Instead of cheddar, I used nutritional yeast for a cheesy, umami flavor without the drawbacks. Bonus: It’s also a great source of B12, which supports energy and metabolism—especially important for those following plant-based diets.

2. Selenium Boost for Anti-Ageing & Muscle Recovery
Broccoli’s anti-ageing power increases 13x when combined with selenium. The original recipe lacked enough selenium, so I added black beans, which not only provide this essential mineral but also increase protein and fiber, making the soup even more satisfying. To take it further, I sprinkled some organic sunflower seeds on top for extra selenium and a light crunch.

3. Tomatoes for UV Protection & Anti-Cancer Benefits
When tomatoes are eaten with broccoli, they enhance protection against cancer and oxidative damage. Lycopene (the antioxidant in tomatoes) is even more effective when eaten with a small amount of healthy fat, so the olive oil in this recipe ensures maximum absorption.

4. Black Beans + Wholemeal Bread = Complete Protein
Cheese was originally used for protein, but swapping it out meant I needed a new complete protein source. The combo of black beans and wholemeal bread provides all essential amino acids, ensuring the body gets everything it needs for muscle growth and repair.

5. Lower Fat, Higher Protein for Lean Gains
Instead of heavy cream, I used organic silken tofu, which gives the same creamy texture without excess fat. This swap keeps the soup light, high in protein, and perfect for maintaining a lean physique.

The Recipe: Supercharged Broccoli & Black Bean Protein Soup

Servings: 4
Per serving: ~20g protein | 5-7g fat | High in fiber & antioxidants
Ingredients:
• 1 tbsp olive oil
• 1 large yellow onion, diced
• 2 large carrots, peeled & diced
• 1 stalk celery, diced
• 2 cloves garlic, minced
• 1/2 tsp smoked paprika
• 1/4 cup chickpea flour (adds protein & thickness)
• 3 cups vegetable broth (or water + bouillon)
• 4 cups broccoli, chopped
• 1 medium tomato, chopped
• 1 can (400g) black beans, drained & rinsed
• 200g silken tofu (blended until smooth)
• 3 tbsp nutritional yeast
• Salt & pepper to taste
• Sunflower seeds for garnish (optional)
• Fresh wholemeal bread (for serving)
Instructions:
1. Sauté the aromatics – Heat olive oil in a pot over medium heat. Add onion, carrot, and celery. Cook for 10 minutes, stirring often.
2. Add garlic, smoked paprika, and chickpea flour. Stir for 1 minute to coat the vegetables.
3. Build the soup – Add vegetable broth, broccoli, tomatoes, and black beans. Bring to a simmer and cook for 8-10 minutes until broccoli is tender.
4. Make it creamy – Stir in blended silken tofu and nutritional yeast. Keep heat low to prevent curdling.
5. Blend for texture – Transfer one cup of soup to a blender, blend until smooth, then return to the pot. Alternatively, use an immersion blender for a slightly chunky texture.
6. Taste & Serve – Add salt & pepper to taste. Garnish with sunflower seeds and serve with wholemeal bread for a complete meal.

Why This Soup is a Game-Changer
✔️ Higher Protein: Black beans + tofu + nutritional yeast = 20g protein per bowl
✔️ Lower Fat: No cheese or heavy cream = leaner, more defined physique
✔️ More Antioxidants: No dairy blocking absorption = maximum anti-ageing benefits
✔️ Complete Meal: Balanced macros + wholemeal bread = energy for workouts & recovery
This is no longer just a soup—it’s a nutrient powerhouse designed to fuel your body, support longevity, and keep you looking (and feeling) your absolute best.
So next time you’re craving a warm, comforting, creamy soup, try this next-level version. It’s satisfying, nourishing, and perfect for anyone serious about health, fitness, and longevity.
Let me know if you try it! And if you ever have a recipe challenge for me, send it my way—I love transforming good meals into supercharged, next-level nutrition!

Boost Your Skin & Hair with Bone Broth: The Best Collagen Types & a Delicious Pâté Recipe
If you’re drinking bone broth for its collagen-boosting benefits, are you getting the right type? And is it actually better than collagen supplements? This blog breaks it all down—plus, you’ll get a nutrient-rich Bone & Marrow Pâté recipe to make the most of your broth leftovers.

If you’re drinking bone broth for its collagen-boosting benefits, are you getting the right type? And is it actually better than collagen supplements? This blog breaks it all down—plus, you’ll get a nutrient-rich Bone & Marrow Pâté recipe to make the most of your broth leftovers.
Why Collagen Matters for Skin, Hair & Joints
Collagen is the most abundant protein in the human body, providing structure to skin, hair, nails, joints, and connective tissues. As we age, collagen production naturally declines, leading to sagging skin, wrinkles, weaker hair, and joint stiffness.
Boosting your collagen intake can help maintain youthful, hydrated skin, strong hair, and resilient joints—but not all collagen is the same. The type you consume matters.
Which Types of Collagen Are Best for Skin & Hair?
There are at least 28 types of collagen, but the most relevant ones for beauty and health are:
• Type I Collagen – Makes up about 90% of the body’s collagen and is the primary type in skin, hair, nails, bones, and tendons. It provides firmness, elasticity, and hydration to the skin, helping reduce wrinkles.
• Type II Collagen – Found mostly in cartilage, making it essential for joint health but less relevant for skin and hair.
• Type III Collagen – Often found alongside Type I in skin, blood vessels, and organs. It helps maintain skin structure and elasticity and plays a key role in wound healing.
Best for skin & hair: Type I and Type III collagen are the most effective for promoting youthful skin and strong hair.
Which Bone Broth Has the Best Collagen?
Different types of bone broth provide different types of collagen, so choosing the right one for your goals is key:
✔ Beef Bone Broth – Rich in Type I & III collagen, making it the best choice for skin, hair, and anti-ageing. It also contains glycine, which supports sleep and skin repair.
✔ Chicken Bone Broth – High in Type II collagen, ideal for joint health but still contains some Type I & III.
✔ Fish Bone Broth – Highest in Type I collagen and the most bioavailable (easiest to absorb), making it a top choice for skin and hair.
Best choice for skin & hair? Beef or fish bone broth.
Bone Broth vs. Collagen Supplements: Which Is Better?
Should you stick with natural bone broth or go for a collagen supplement? Here’s how they compare:
Bone Broth: The Whole-Food Collagen Source
✔ Rich in natural collagen, amino acids, minerals, and hyaluronic acid.
✔ Supports gut health, which is crucial for absorbing nutrients and producing collagen.
✔ Contains gelatin, which helps skin hydration and joint lubrication.
✔ Provides a wide range of nutrients, not just collagen.
Collagen Supplements: A Targeted Boost
✔ Hydrolysed collagen peptides are broken down, making them easy to absorb.
✔ Allows you to target specific types, e.g. Type I & III for skin or Type II for joints.
✔ More convenient—no need to cook or drink large amounts of broth.
Verdict:
If you want a whole-food, nutrient-dense source, bone broth is the better option. But if you need a quick, high-dose collagen boost, a high-quality collagen supplement (preferably hydrolysed Type I & III) can be effective too.
Whichever you choose, always pair collagen intake with vitamin C-rich foods (like citrus, berries, and peppers) to boost absorption.
Nutrient-Rich Bone & Marrow Pâté Recipe

One of the best ways to maximise your collagen intake is by using every part of your broth—including the soft bones, marrow, and leftover meat. This creamy, protein-packed pâté is not only delicious but also an easy way to sneak in more collagen.
Ingredients:
✔ ½ cup soft bones, marrow, and meat (from your strained broth)
✔ 2 tbsp butter or olive oil (or the fat from your broth)
✔ 1 clove garlic, minced
✔ ½ small onion or shallot, finely chopped
✔ 1 tsp dried herbs (thyme, rosemary, or oregano)
✔ Salt & pepper to taste
✔ 1 tbsp lemon juice or apple cider vinegar (for flavour & digestion)
✔ 2–3 tbsp broth (for blending)
Instructions:
1️⃣ Sauté the aromatics:
• Heat 1 tbsp butter or oil in a pan.
• Add garlic and onion, sautéing until soft and fragrant.
2️⃣ Blend everything:
• In a blender or food processor, add the soft bones, marrow, meat, herbs, salt, pepper, lemon juice, and the sautéed garlic/onion.
• Add 2–3 tbsp broth to help with blending.
• Blend until smooth, adding more broth if needed to reach a pâté-like consistency.
3️⃣ Adjust & store:
• Taste and adjust seasoning.
• Transfer to a jar or container and chill in the fridge for a few hours to firm up.
How to Eat It:
✔ Spread on whole grain crackers, toast, or pita.
✔ Use as a filling for wraps or sandwiches.
✔ Serve with cucumber slices or vegetable sticks.
Final Thoughts
Bone broth is a powerhouse for collagen, skin, hair, and overall health—but knowing which type of broth provides the right collagen can help you get the best results.
• For skin, hair, and anti-ageing? Stick to beef or fish bone broth (rich in Type I & III collagen).
• For joint health? Chicken broth is highest in Type II collagen.
• Bone broth vs. supplements? Bone broth gives a broader nutrient profile, while supplements are a more concentrated, convenient option.
And if you want to maximise your collagen intake, this Bone & Marrow Pâté is a delicious, waste-free way to do it!
Are you a bone broth lover? Let me know in the comments if you try this recipe!

Why You Should Be Making Your Own Bone Broth (and How to Do It Right!)
💰 Stop Overpaying for Bone Broth—Make It Yourself!
Bone broth is packed with collagen, amino acids, and minerals that support skin, gut health, and immunity—but did you know you can make it at home for a fraction of the cost? While store-bought options can cost £4.50 for just 350ml, you can make 3 litres of rich, nourishing broth for less!
In this guide, I’ll show you:
✔️ Easy, step-by-step recipes for chicken, beef, and fish broth
✔️ Where to source high-quality bones (for cheap—or free!)
✔️ How to extract maximum collagen for the best health benefits
💡 Ditch the overpriced sachets and start making real, nutritious bone broth at home today!

Bone broth has taken the health and wellness world by storm, with brands charging a fortune for tiny sachets of the stuff. But here’s the secret they don’t want you to know: you can make it yourself for a fraction of the price—and it’s even better homemade!
I recently made a batch of chicken bone broth after buying a whole chicken for less than £4.50. Not only did I end up with at least 3 litres of rich, nourishing broth, but I also had a week’s worth of chicken meat for meals. Meanwhile, pre-packaged bone broth can cost upwards of £4.50 for just 350ml in supermarkets, and online retailers charge an eye-watering £45 for six 500ml cartons! If you’re not already making your own broth, you’re literally pouring money down the drain.
But it’s not just about saving money—homemade bone broth is packed with nutrients, collagen, and deep, rich flavour that shop-bought versions can’t compete with. And the best part? It’s ridiculously easy to make!
Why Bone Broth is So Beneficial
Bone broth isn’t just a warm, comforting drink—it’s packed with collagen, amino acids, and minerals that support skin health, gut healing, immune function, and joint strength. The longer you simmer the bones, the more nutrients are released into the broth.
Each type of broth has its own unique benefits:
Chicken broth is rich in gelatin and easy to digest, making it perfect for gut health and recovery.
Beef broth has a deeper, more robust flavour and contains higher amounts of collagen.
Fish broth is loaded with iodine, which supports thyroid function and metabolism.
Where to Get Bones for Your Broth
Buying bones doesn’t have to be expensive! Here’s where to find them:
✔️ Butchers – Your local butcher will often sell beef, chicken, or fish bones for cheap (or even give them away). For beef bones, ask your butcher for marrow bones, knuckle bones, oxtail, or short ribs.
✔️ Supermarkets – Whole chickens, bone-in cuts like drumsticks or thighs, and beef short ribs are all great sources. Some supermarkets sell beef bones in the frozen section.
✔️ Fishmongers – Ask for fish heads, backbones, and tails (usually very inexpensive). Fishmongers often give away fish heads, frames, and tails for free—just ask! Wild-caught white fish like cod, haddock, or sole make the best broth. Avoid oily fish like salmon, as it can turn bitter.
✔️ Farm Shops or Online Suppliers – Great for grass-fed beef bones or organic chicken carcasses.
✔️ Save Your Own – Keep leftover bones from roasted chickens, steaks, or fish fillets and freeze them until you’re ready to make broth. For chicken bones, a whole chicken is the best option since you get broth plus a week’s worth of meat!
👉🏻 The quality of your bones matters—organic, grass-fed, or wild-caught bones will have more nutrients and fewer toxins than factory-farmed ones.
Now, let’s get to the recipes!
How to Make Bone Broth at Home (for Pennies!)
Here are two methods depending on whether you’re starting with a whole chicken or just using leftover bones.
Whole Chicken Bone Broth (with Meat Removal Step)

This method is perfect if you’re cooking a whole chicken and want to make broth while also saving the meat for meals.
Ingredients:
• 1 whole chicken
• 1 onion, quartered
• 2 carrots, chopped
• 2 celery stalks, chopped
• 4 garlic cloves, smashed
• 1-2 bay leaves
• 1 tsp black peppercorns
• 1 tbsp apple cider vinegar (helps extract minerals from bones)
• Water (enough to cover everything)
Method:
1️⃣ Pre-boil the chicken: Place the whole chicken in a large pot, cover with water, and bring to a boil for 5-10 minutes. You’ll see foam and scum rise to the top—this removes impurities and results in a cleaner broth. Drain and rinse the chicken.
2️⃣ Transfer the chicken to a slow cooker or stockpot and cover with fresh water. Add the onion, carrots, celery, garlic, bay leaves, peppercorns, and apple cider vinegar.
3️⃣ Bring to a simmer and skim off any remaining foam.
4️⃣ After 1.5–2 hours, check the chicken. If the meat is fully cooked and falling off the bones, remove the chicken from the pot. Strip off all the meat and set it aside for meals.
5️⃣ Return the carcass and bones to the pot and continue simmering for 12-24 hours.
6️⃣ Strain the broth and store in the fridge for up to 5 days, or freeze in portions.
👉 For a richer, more gelatinous broth, add chicken feet or wings—they’re packed with collagen and will give your broth a thicker, silkier texture.
Chicken Bone Broth (Using Leftover Bones)

This method is great if you’ve already eaten the chicken and want to use the leftover carcass and bones.
If you’re roasting a whole chicken or buying chicken pieces, don’t throw the bones away—turn them into liquid gold!
Best Bones to Use
✔️ For a richer, more gelatinous broth, use chicken feet or wings, as they contain lots of collagen!
Ingredients:
• 1 chicken carcass or leftover bones
• 1 onion, quartered
• 2 carrots, chopped
• 2 celery stalks, chopped
• 4 garlic cloves, smashed
• 1-2 bay leaves
• 1 tsp black peppercorns
• 1 tbsp apple cider vinegar
• Water (enough to cover everything)
Method:
1️⃣ Place the chicken bones in a large pot or slow cooker. If they’re raw, you can roast them at 200°C for 20-30 minutes for deeper flavour.
2️⃣ Add the vegetables, herbs, and apple cider vinegar, then cover with water.
3️⃣ Bring to a simmer and skim off any foam that rises to the top in the first hour.
4️⃣ Let it simmer for 12-24 hours, adding water as needed.
5️⃣ Strain and store the broth as with the whole chicken method.
Beef Bone Broth Recipe

Beef bones take longer to release their nutrients, but they create a deeply flavourful, protein-rich broth.
Best Bones to Use
✔️ For extra depth, combine marrow bones (for flavour) with knuckle bones (for gelatin).
Ingredients:
• 1 kg beef bones (marrow, knuckle, or shank bones work best)
• 1 onion, quartered
• 2 carrots, chopped
• 2 celery stalks, chopped
• 4 garlic cloves, smashed
• 2-3 bay leaves
• 1 tbsp tomato paste (optional, for richness)
• 1 tsp black peppercorns
• 2 tbsp apple cider vinegar
• Water (to cover)
Method:
1️⃣ Roast the bones at 200°C for 30-40 minutes for a richer flavour.
2️⃣ Transfer to a pot or slow cooker, add the vegetables, herbs, and vinegar, and cover with water.
3️⃣ Bring to a boil, skim off foam, then reduce to a gentle simmer.
4️⃣ Simmer for at least 4 hours, ideally 12+ hours for maximum collagen extraction.
5️⃣ Strain and store as with chicken broth.
Fish Broth Recipe

Fish broth is an incredible source of iodine, minerals, and collagen and is much faster to make than chicken or beef broth.
Best Bones to Use
✔️ Fish heads, frames (backbones), and tails from non-oily fish (e.g., cod, haddock, halibut, sole, or snapper).
Ingredients:
• 1 kg fish bones (heads, frames, tails)
• 1 onion, quartered
• 2 celery stalks, chopped
• 2 garlic cloves, smashed
• 1 bay leaf
• 1 tsp black peppercorns
• 1 tbsp apple cider vinegar or lemon juice
• A handful of fresh parsley (optional)
• Water (to cover)
Method:
1️⃣ Rinse the fish bones well to remove any blood (this prevents bitterness).
2️⃣ Add all ingredients to a large pot and cover with water.
3️⃣ Bring to a boil, then reduce to a gentle simmer.
4️⃣ Simmer for 45 minutes to 2 hours—avoid cooking longer, as fish broth extracts minerals quickly.
5️⃣ Strain and use immediately, or store in the fridge for up to 3 days (it doesn’t last as long as other broths but can be frozen).
Why Do Some Broths Take Longer to Cook?
Different types of bones release their nutrients at different speeds, which is why cooking times vary:
✔️ Fish Broth (45 mins – 2 hours) – Fish bones are thin and porous, so they release collagen and minerals very quickly. Cooking longer can make the broth bitter.
✔️ Chicken Broth (12 – 24 hours) – Chicken bones are softer and more delicate, so they break down faster than beef bones but slower than fish.
✔️ Beef Broth (12 – 48 hours) – Beef bones are dense and packed with collagen, meaning they need much longer to extract all the goodness. Roasting them first helps speed up the process.
If using a slow cooker, you can let your broth simmer for longer to extract even more nutrients without needing to keep an eye on it.
Final Thoughts: Start Making Bone Broth & Save £££
Making your own bone broth isn’t just better for your health—it’s better for your wallet too. If you’ve never made broth before, give it a go—you’ll never want to buy it again!
Be sure to check out my soup recipes, where I use bone broth as a key ingredient. And if you’re making my soup recipes, why not take them to the next level with homemade bone broth instead of shop-bought?

Glow-Boosting Roasted Pepper Soup: Lycopene-Rich & Protein-Packed
Looking for a delicious way to nourish your skin and body? This antioxidant-rich roasted pepper soup is packed with lycopene—a powerful compound that helps protect against UV damage, promotes youthful skin, and supports overall health. Plus, with customisable protein options, it’s a satisfying meal that fuels muscle recovery and keeps you fuller for longer. Naturally gluten-free, dairy-free, and bursting with flavour, this soup is the perfect addition to your healthy eating routine. Try it today and glow from the inside out!

A delicious, antioxidant-filled soup for youthful skin, muscle recovery, and overall health!
Looking for a meal that nourishes your body from the inside out? This Glow-Boosting Roasted Pepper Soup isn’t just rich in flavour—it’s packed with lycopene, a powerful antioxidant known for its skin-protecting, anti-ageing, and disease-fighting properties.
With the option to add protein—whether plant-based or animal-based—this soup is customisable, satisfying, and perfect for any season. Plus, it’s naturally gluten-free, dairy-free, and loaded with anti-inflammatory ingredients to support your health and fitness goals.
Why Lycopene? The Secret to Radiant Skin & Health
Lycopene is a potent antioxidant found in red fruits and vegetables, including red bell peppers and tomatoes. It’s been linked to skin protection, reduced inflammation, and lower risks of certain chronic diseases.
Benefits of Lycopene:
✔ Protects skin from UVA & UVB damage, reducing wrinkles and fine lines
✔ Fights inflammation, helping to maintain youthful, healthy skin
✔ Supports heart health, lowering the risk of cardiovascular diseases
✔ May help prevent certain cancers, including prostate, lung, and breast cancer
Since cooking enhances lycopene’s bioavailability, this roasted pepper soup is one of the tastiest ways to get more of it!
💡 Did You Know?
🌞 Lycopene is Nature’s Sunscreen! While it doesn’t replace SPF, studies show that eating lycopene-rich foods can reduce sunburn intensity by up to 40% after 10 weeks of regular consumption. It absorbs UVA & UVB rays, helping to prevent photo-ageing and skin damage from the inside out!
Boost Your Protein: Stay Fuller & Support Muscle Health
This soup isn’t just good for your skin—it’s also high in protein! Whether you’re aiming for muscle recovery, weight management, or simply a more filling meal, you can easily customise the protein content to suit your needs.
Protein Options:
🥦 Plant-Based: Lentils, chickpeas, quinoa or tofu (vegan-friendly boost!)
🍗 Animal-Based: Grilled chicken or bone broth (extra protein & collagen!)
Why Add Protein?
✔ Muscle repair & recovery
✔ Boosts metabolism & keeps you fuller for longer
✔ Supports skin elasticity & healthy ageing
Glow-Boosting Roasted Pepper Soup Recipe
🌿 Naturally vegan, gluten-free, and packed with antioxidants!
Ingredients:
• 2 red bell peppers
• 1 yellow bell pepper
• 1 large tomato (or 2 small ones) (extra lycopene boost!)
• 1 small onion, chopped
• 2 cloves garlic, minced
• 500ml vegetable stock (or bone broth for added protein & collagen)
• 1 tbsp olive oil (healthy fats for nutrient absorption)
• ½ tsp smoked paprika (optional, for extra depth of flavour)
• ½ tsp turmeric (anti-inflammatory benefits!)
• Salt & pepper, to taste
• 1 tbsp apple cider vinegar or lemon juice (enhances flavour & nutrient absorption)
Optional Protein Additions:
🥦 Vegan: 1 cup cooked lentils, chickpeas, quinoa, or 150g tofu
🍗 Non-Vegan: 150g grilled chicken
Garnish:
🌿 Fresh basil or parsley
Instructions:
1. Roast the Peppers & Tomato
🔥 Preheat your oven to 200°C.
🔪 Cut the bell peppers and tomato in half, removing the seeds.
🥄 Place them on a baking tray, skin-side up, drizzle with olive oil, and roast for 25 minutes until skins are charred.
❄ Let cool slightly, then peel off the skins for a smooth texture.
2. Sauté the Aromatics
🍳 In a large saucepan, heat olive oil over medium heat.
🧅 Add chopped onion & garlic, cooking until soft & fragrant (about 5 minutes).
3. Blend & Simmer
🫙 Add roasted peppers, tomato, smoked paprika, turmeric, and vegetable stock to the pot.
🌀 Blend the mixture with a hand blender until smooth.
💪 Stir in protein additions (lentils, chickpeas, quinoa, chicken, or tofu.
4. Season & Serve
🧂 Add salt, pepper, and apple cider vinegar/lemon juice to balance flavours.
🌿 Garnish with fresh basil or parsley. For extra creaminess, swirl in coconut milk or cashew cream.
Serving Suggestions:
✨ Enjoy on its own, or pair with:
🍞 Whole-grain bread for extra fibre
🥗 A fresh Greek-style salad
🍚 A side of quinoa for added protein
Nutritional Benefits at a Glance:
🍅 Lycopene: Protects skin from UV damage & supports anti-ageing
💪 Protein: Essential for muscle recovery & satiety
🌿 Turmeric & Paprika: Anti-inflammatory & rich in antioxidants
🫒 Olive Oil: Helps absorb fat-soluble vitamins & supports heart health
Final Thoughts
This soup isn’t just about flavour—it’s about functional nutrition. Every ingredient has a purpose, whether it’s fighting inflammation, boosting collagen, or keeping you full. Plus, with protein customisation, it suits every lifestyle.
💡 So, why not make this a staple in your meal rotation? Your skin, muscles, and taste buds will thank you!

The Ultimate Healthy Gingernuts: A Guilt-Free, Crunchy Classic
Love the warming spice and satisfying crunch of classic gingernuts but want a healthier, blood sugar-friendly version? These refined sugar-free, gut-friendly, and lower GI biscuits are packed with fibre, healthy fats, and natural sweetness—without compromising on flavour. Made with oat flour, ground almonds, xylitol, and chicory root syrup, they deliver the perfect balance of crispness and chew while supporting digestion and energy levels.
Whether you’re looking for a better-for-you biscuit, a satisfying snack, or just an excuse to bake something delicious, these ultimate healthy gingernuts are everything you love—just smarter. Click to get the full recipe and start baking!

If you love the warm, spiced crunch of a classic gingernut biscuit but want a healthier, blood sugar-friendly alternative, you’re in for a treat. My version of this nostalgic biscuit is lower GI, gut-friendly, and packed with nutrients—while still delivering that satisfying crunch and deep ginger flavour we all crave.
Why This Recipe is a Game-Changer
Unlike traditional gingernuts, which rely on refined flour, sugar, and butter, this version is designed to support stable blood sugar levels, gut health, and overall well-being. Here’s how:
✅ Oat Flour & Ground Almonds → Higher in fibre and lower GI than white flour, making these biscuits more blood sugar-friendly. Almonds also add healthy fats for a satisfying texture.
✅ Xylitol + Inulin → Xylitol keeps sweetness without spiking glucose, and inulin is a prebiotic fibre that feeds good gut bacteria.
✅ Naturli Vegan Block → A plant-based fat alternative with a better nutritional profile than butter, offering a mix of healthy fats, including omega-3s.
✅ Vegan Honey or Chicory Root Syrup → A refined sugar-free sweetener with a lower glycaemic impact, helping to keep energy levels steady.
✅ Chia Egg Option → Adds omega-3s and boosts digestion while keeping the recipe vegan-friendly.
These swaps make for a biscuit that’s not only delicious but also much kinder to your body.
The Recipe: Crunchy, Spiced, and Completely Guilt-Free
Ingredients (Makes 30 biscuits)
• 300g (10½ oz) oat flour (or 150g oat flour + 150g spelt flour for extra crunch)
• 50g (1¾ oz) ground almonds (adds healthy fats and a light texture)
• Pinch of salt
• 150g (5¼ oz) xylitol (or 100g xylitol + 50g inulin for gut health)
• 1 tbsp ground ginger (for that signature warming spice)
• 1 tsp bicarbonate of soda (helps with rise and crispness)
• 125g (4½ oz) Naturli Vegan Block (for the best fat profile)
• 75g (2½ oz) vegan honey (or chicory root syrup for the lowest GI)
• 1 egg (or chia egg: 1 tbsp ground chia seeds + 3 tbsp water, mixed and left for 5 mins to thicken)
• 1 tsp grated orange zest (adds a subtle citrusy depth to the ginger spice)
Instructions
Preheat & Prepare
Preheat your oven to 160°C (325°F) and line baking trays with parchment paper.
Mix Dry Ingredients
In a large mixing bowl, whisk together the oat flour, ground almonds, salt, xylitol, inulin (if using), ginger, and bicarbonate of soda.
Melt Butter & Syrup
In a small saucepan over low heat, melt the Naturli Vegan Block with the vegan honey (or chicory root syrup). Stir gently until fully combined, then remove from heat.
Combine Wet & Dry
Let the butter mixture cool slightly, then pour it into the dry ingredients.
Add Egg & Orange Zest
Stir in the egg (or chia egg) and orange zest, mixing well until a soft dough forms.
Shape & Flatten
Roll the dough into 30 even-sized balls and place them well apart on the baking trays. Flatten them slightly with your fingers.
Bake to Perfection
Bake for 15-20 minutes or until golden brown. If you prefer extra crunchy gingernuts, leave them in for a few minutes longer.
Cool & Enjoy!

Transfer to a wire rack and let them cool completely before enjoying their perfect crunch.
Why You’ll Love These Healthy Gingernuts
Not only do these biscuits taste incredible, but they also work with your body rather than against it.
✔️ Low Glycaemic Impact – No refined sugar, stabilising blood sugar levels and preventing energy crashes.
✔️ Gut-Friendly – Inulin and fibre from oat flour and almonds support digestion and gut bacteria.
✔️ Crispy & Flavourful – Just as crunchy as traditional gingernuts, with an added hint of citrus to enhance the ginger warmth.
✔️ Vegan & Dairy-Free Option – Swap the egg for a chia egg, and these biscuits become completely plant-based.
Storage & Serving Suggestions

• Store in an airtight container for up to 2 weeks—though they rarely last that long!
• Serve with a cup of tea or dunk into your favourite plant-based milk for the ultimate treat.
• Crumble over Greek yoghurt or protein ice cream for a high-protein, crunchy topping.
Final Thoughts: A Healthier Way to Enjoy a Classic Treat
With all the warmth and spice of traditional gingernuts but none of the refined sugar or processed flour, this recipe is proof that healthy eating doesn’t mean compromising on flavour. Whether you’re looking for a better-for-you biscuit, a blood sugar-friendly snack, or just an excuse to bake something delicious, these are the ultimate guilt-free indulgence.
Let me know if you try this recipe—I’d love to hear how they turn out!

Blueberry and Strawberry Chia Seed Spreads: Delicious and Healthy Jam Recipes
Looking for a healthy, delicious spread to brighten your mornings? This homemade blueberry and strawberry chia seed jam is packed with flavour, fibre, and antioxidants. Using just a few simple ingredients like fresh berries, chia seeds, and a touch of xylitol for sweetness, this jam is not only low GI but also promotes collagen and supports dental health. Perfect for spreading on toast, mixing into yogurt, or adding to your favourite smoothie, this jam is a guilt-free way to satisfy your sweet cravings while nourishing your body.

Looking for a healthy, low-GI alternative to store-bought jams? These blueberry and strawberry chia seed spreads are game-changers! Simple to make, packed with antioxidants, and sweetened with xylitol—these spreads are gentle on your teeth and support collagen production. Whether you spread them on wholemeal bread or use them as toppings for yogurt or oatmeal, they’re sure to become staples in your kitchen.
Why You’ll Love These Recipes
• Low GI: Supports stable blood sugar levels.
• Collagen-Friendly: Xylitol promotes collagen and is gentle on teeth.
• Quick and Easy: Made with just a handful of ingredients.
• Versatile: Perfect for breakfast, snacks, or desserts.
Blueberry Chia Seed Spread

Ingredients
• 1 cup frozen blueberries (defrosted)
• 1–2 tablespoons chia seeds
• 1–2 teaspoons xylitol (adjust to taste)
• 1 teaspoon lemon juice (optional, for added brightness)
Instructions
1. Defrost Blueberries:
Place the frozen blueberries in a bowl and let them defrost naturally, or microwave them for 30–60 seconds until softened.
2. Mash the Blueberries:
Using a fork or potato masher, mash the blueberries to your desired consistency.
3. Add Chia Seeds:
Stir in the chia seeds until evenly distributed.
4. Sweeten:
Add 1–2 teaspoons of xylitol and mix thoroughly. Adjust the sweetness to your liking.
5. Let It Thicken:
Allow the mixture to sit for 10–15 minutes, stirring occasionally.
6. Taste and Adjust:
Add water or lemon juice if too thick, or more chia seeds if too thin.
7. Store and Enjoy:
Transfer to an airtight container and store in the fridge for up to a week.
Strawberry Chia Seed Spread

Ingredients
• 1 cup fresh or frozen strawberries (hulled and defrosted, if frozen)
• 1–2 tablespoons chia seeds
• 1–2 teaspoons xylitol (adjust to taste)
• 1 teaspoon lemon juice or balsamic vinegar (optional, for added depth)
Instructions
1. Prepare Strawberries:
If using fresh strawberries, wash and hull them. If frozen, defrost as above.
2. Mash the Strawberries:
Mash the strawberries until your desired consistency is reached.
3. Add Chia Seeds:
Stir in the chia seeds.
4. Sweeten:
Mix in xylitol, adjusting to your taste preference.
5. Let It Thicken:
Let sit for 10–15 minutes, stirring occasionally.
6. Taste and Adjust:
Adjust the consistency and flavor as needed.
7. Store and Enjoy:
Store in the fridge for up to a week.
Serving Suggestions
• Spread on wholemeal toast or crackers.
• Add as a topping to oatmeal, yogurt, or pancakes.
• Swirl into smoothies or overnight oats for a fruity twist.
Why Use Xylitol?
Xylitol is a low-GI sweetener with unique benefits:
• Helps prevent spikes in blood sugar levels.
• Promotes collagen production for healthy skin and joints.
• Supports dental health.
Try these chia seed spreads today to elevate your breakfasts and snacks! Let me know how you’ve enjoyed them or share your creations with friends.

Festive Mocktails for Radiant Skin and Wellness: Low-GI Drinks for the Holidays
Celebrate the holidays with delicious low-GI mocktails that are perfect for your health and beauty goals. Packed with hydration, antioxidants, and festive flavors, these alcohol-free drinks let you enjoy the season without compromising your wellness.

The holiday season is here, and with it comes plenty of gatherings, festive cheer, and indulgent treats. But if you’re prioritizing your health, beauty, or weight loss goals, sugary cocktails and high-calorie drinks can quickly derail your progress.
Fortunately, you don’t need to sacrifice flavor or fun! Low-GI mocktails offer the perfect solution, combining festive flavors with health-boosting benefits. These alcohol-free drinks keep your blood sugar stable while nourishing your skin and body from the inside out.
In this post, I’ll share five of my favourite low-GI mocktail recipes—perfect for sipping during holiday parties or New Year celebrations.
Why Low-GI Drinks Are a Game Changer
The glycemic index (GI) measures how quickly foods and drinks raise your blood sugar levels. High-GI options cause spikes in blood sugar, leading to energy crashes, cravings, and increased fat storage. These rapid spikes can also damage collagen through a process called glycation, which forms advanced glycation end products (AGEs), contributing to premature skin ageing, wrinkles, and loss of elasticity. On the other hand, low-GI options promote steady energy, reduced cravings, and better blood sugar management, helping to protect your skin and overall health.
Here’s why low-GI mocktails are perfect for the holidays:
Avoid sugar crashes and bloating: Keep your energy levels stable without the bloating effects of sugary beverages.
Weight Management: Low-GI drinks prevent blood sugar spikes that can lead to cravings and overeating. Plus, alcohol is calorie-dense, and these mocktails offer a lighter, lower-calorie alternative.
Beauty Benefits: Ingredients like vitamin C, antioxidants, and hydration support skin health and collagen production, while preventing glycation, which can damage collagen and cause premature ageing.
No Hangovers: Alcohol-free options mean you wake up feeling refreshed and energised.
Beyond blood sugar stability, alcohol itself poses several challenges to maintaining youthful, glowing skin:
Dehydration: Alcohol is a diuretic, causing your body to lose water and essential nutrients like vitamin A, which is vital for skin health. Dehydrated skin often appears dull, grey, and wrinkled.
Collagen Depletion: Alcohol reduces the body’s natural collagen production, leading to loss of elasticity and firmness in the skin.
Blood Vessel Expansion: Alcohol can dilate blood vessels in the face, leading to redness, broken capillaries, and spider veins.
Accelerated Ageing: Studies have linked high alcohol intake to shorter telomeres, markers of biological aging, resulting in premature wrinkles and sagging skin.
B Vitamin Depletion: Alcohol depletes B vitamins, which are essential for collagen maintenance, cell turnover, and hydration.
Whether you’re sticking to fitness goals, maintaining your skin’s glow, or simply looking for a delicious non-alcoholic alternative, these mocktails are your perfect party companions.
5 Delicious Low-GI Mocktails That Won’t Sabotage Your Goals
Cucumber & Mint Hydration Elixir
Benefits: Hydration, skin health, digestion

This refreshing drink is light, crisp, and perfect for keeping you energised during long evenings.
Ingredients:
1 cucumber, thinly sliced
A handful of fresh mint leaves
Juice of 1 lime
300ml cold water or coconut water (for extra electrolytes)
Ice cubes
Health & Beauty Boost:
Hydration: Cucumber is 95% water, keeping your body and skin hydrated.
Collagen Boost: Lime is rich in vitamin C, essential for collagen production.
Digestion: Mint soothes the digestive system.
Calories & Macronutrients (per serving):
Calories: ~10
Carbs: 2g
Protein: 0g
Fat: 0g
Key Nutrients: Vitamin C, potassium, antioxidants
Pro Tip: Add a pinch of pink Himalayan salt for added electrolytes if you’ve been active or dancing the night away!
Learn more about the vital role of water in training, health and beauty here.
2. Berry & Hibiscus Glow Tea
Benefits: Antioxidants, anti-inflammatory, skin health

This vibrant drink combines antioxidant-rich berries with tangy hibiscus tea, making it a festive favourite.
Ingredients:
• 1 hibiscus tea bag (chilled)
• 1 cup mixed berries (blueberries, raspberries, strawberries)
• Juice of ½ lemon
• Stevia or monk fruit to taste
• 300ml cold water
• Ice cubes
Health & Beauty Boost:
• Antioxidants: Berries and hibiscus tea are loaded with anthocyanins and vitamin C, which fight free radical damage and support skin elasticity.
• Anti-Inflammatory: Hibiscus tea helps reduce inflammation and regulate blood
Calories & Macronutrients (per serving):
• Calories: ~30
• Carbs: 7g
• Protein: 0.5g
• Fat: 0g
• Key Nutrients: Vitamin C, manganese, flavonoids
3. Green Tea & Aloe Cooler
Benefits: Weight management, gut health, skin repair

Boost your metabolism and support your skin with this soothing and rejuvenating drink.
Ingredients:
• 1 green tea bag (or matcha for extra antioxidants)
• 2 tbsp aloe vera juice (edible grade)
• 1 tsp honey or agave nectar (optional)
• 200ml cold water
• Ice cubes
Health & Beauty Boost:
• Metabolism: Green tea contains EGCG, which supports fat burning.
• Skin Healing: Aloe vera promotes skin regeneration and hydration.
• Gut Health: Aloe soothes and supports digestion.
Calories & Macronutrients (per serving):
• Calories: ~15 (without sweetener)
• Carbs: 3g
• Protein: 0g
• Fat: 0g
• Key Nutrients: Antioxidants, vitamin C, polyphenols
Learn about the health, fitness and beauty benefits of matcha tea.
4. Coconut & Turmeric Beauty Blend
Benefits: Anti-inflammatory, boosts collagen, supports immunity

Golden and festive, this drink combines the anti-inflammatory power of turmeric with hydrating coconut water.
Ingredients:
• 200ml coconut water
• ½ tsp turmeric powder
• 1 tsp grated ginger
• Juice of 1 orange (or swap for lemon for a lower GI)
• A pinch of black pepper (to activate turmeric)
• Ice cubes
Health & Beauty Boost:
• Anti-Inflammatory: Turmeric fights puffiness and inflammation.
• Circulation: Ginger promotes blood flow, giving your skin a natural glow.
• Hydration: Coconut water replenishes electrolytes.
Calories & Macronutrients (per serving):
• Calories: ~40 (with orange juice)
• Carbs: 9g
• Protein: 0.5g
• Fat: 0g
• Key Nutrients: Potassium, curcumin, vitamin C
Related Post: Herbal Remedies for Back Pain: A Natural Alternative to Prescription Pills.
5. Collagen Lemonade
Benefits: Collagen production, skin elasticity, hydration

For a drink that nourishes your skin from the inside out, this collagen-infused lemonade is unbeatable.
Ingredients:
1-2 scoops of unflavoured collagen powder
Juice of 2 lemons
300ml cold water
1 tsp chia seeds
Stevia or monk fruit to taste
Ice cubes
Health & Beauty Boost:
Skin Elasticity: Collagen supports firm, youthful skin.
Hydration: Chia seeds absorb water, providing long-lasting hydration.
Collagen Production: Lemon’s vitamin C boosts your body’s natural collagen synthesis.
Calories & Macronutrients (per serving):
Calories: ~30 (depending on collagen brand)
Carbs: 2g
Protein: 6-10g
Fat: 1g
Key Nutrients: Vitamin C, zinc, amino acids
Explore vegan protein recipes here.
Quick FAQ
Q: Can I make these mocktails ahead of time?
Yes! Prepare the base (tea or infused water) a day before and store in the fridge. Add fresh ingredients like mint, berries, or ice just before serving.
Q: What’s the best low-GI sweetener to use?
Stevia and monk fruit are excellent low-GI sweeteners, with GI scores of 0 and 0 respectively. These natural, calorie-free sweeteners don’t spike blood sugar, making them ideal for those looking to maintain stable blood sugar levels while enjoying sweetness. Stevia is made from the leaves of the stevia plant, and monk fruit is derived from a small fruit native to China.
Xylitol is another fantastic low-GI sweetener, with a GI score of just 7. It’s derived from natural sources like the birch tree or corn, and unlike regular sugar, xylitol is absorbed slowly into the bloodstream, preventing sharp increases in blood sugar levels. Xylitol has also been shown to promote collagen production, which supports skin elasticity and helps combat signs of ageing, making it an excellent choice for those interested in anti-ageing. Xylitol contains about 2.4 calories per gram, which is lower than sugar but still something to consider when managing overall calorie intake.
In addition to its skin benefits, xylitol is a dentist’s favourite because it can help protect teeth. It’s commonly found in sugar-free chewing gum and is known to reduce the risk of cavities and dental decay. That’s why many dentists recommend it over sugar.
Important: Xylitol is toxic to dogs, so be sure to keep it out of reach of your pets!
Related Posts: Sweet Swaps: Healthier Alternatives to Sugar That Won't Spike Your Blood Sugar and How Plant-Based Diets Can Help Reduce Sugar Cravings: A Natural Solution.
Sip Your Way to Health, Beauty, and Wellness
These low-GI mocktails are the perfect companions for your holiday celebrations, helping you stay on track with your health and beauty goals. Serve them at gatherings or enjoy them solo as a refreshing, nourishing treat.
Ready to try these recipes? Let me know your favourite in the comments below, or share your creations with me on social media!

A Compassionate and Macro-Friendly Vegan Christmas Feast
Celebrate Christmas with a compassionate twist—an irresistible vegan feast that’s packed with flavour, protein, and holiday cheer. From a savoury seitan ‘turkey’ roast to decadent chocolate mousse, this macro-friendly menu proves you can enjoy a festive meal that’s kind to animals, your health, and the planet.

Twinkling lights, laughter around the table, and the aroma of festive dishes wafting through the air—this is Christmas. This year, why not make it even more special by celebrating with a feast that’s cruelty-free, nutrient-dense, and packed with flavour?
Christmas is the season of giving, love, and joy. Yet, behind many traditional meals lies a story of immense suffering. Millions of turkeys spend their lives in overcrowded sheds, deprived of sunlight and fresh air, only to meet a cruel end. But it doesn’t have to be this way.
By choosing a compassionate alternative, we can celebrate the holidays with kindness—leaving cruelty off the table while savouring a delicious, festive feast. And the best part? This macro-friendly menu is perfect for those focusing on weight loss, building muscle, or simply staying healthy during the holiday season.
Why Choose Vegan This Christmas?

Imagine spending your life in a crowded shed with no freedom to roam, only to face a terrifying end. This is the reality for millions of turkeys every Christmas. By opting for plant-based alternatives, we can create a celebration filled with joy and compassion—without sacrificing flavour or tradition.
Let’s make this Christmas about kindness—not just to our loved ones but to all living beings.
A Macro-Friendly Vegan Menu for Christmas
The good news is, creating a cruelty-free holiday meal doesn’t mean compromising on taste or nutrition. This festive menu is balanced, satisfying, and perfect for sharing with family and friends. Every dish has been thoughtfully crafted to align with your health goals, delivering incredible flavors and the nutrition your body needs.
The Menu & Macros (Per Serving)
Seitan ‘Turkey’ Roast with Herb Gravy (150g per serving)
• Protein: 25g | Carbs: 15g | Fat: 3g
High-Protein Mashed Cauliflower and White Beans (180g per serving)
• Protein: 8g | Carbs: 12g | Fat: 2g
Garlic-Roasted Green Beans and Mushrooms (100g per serving)
• Protein: 3g | Carbs: 8g | Fat: 1g
Cinnamon-Glazed Carrots (120g per serving)
• Protein: 2g | Carbs: 10g | Fat: 0g
High-Protein Chocolate Mousse (120g per serving)
• Protein: 12g | Carbs: 18g | Fat: 5g
This colourful feast doesn’t just taste incredible—it’s a balanced meal packed with festive flavours and optimal nutrition.
How to Prepare Your Vegan Christmas Feast
Seitan ‘Turkey’ Roast with Herb Gravy (Serves 6)

Ingredients
Dry Ingredients:
• 200g vital wheat gluten
• 2 tbsp nutritional yeast
• 1 tsp garlic powder
• 1 tsp onion powder
• 1 tsp dried sage
• 1 tsp dried thyme
Wet Ingredients:
• 200ml vegetable broth
• 2 tbsp soy sauce
• 1 tbsp olive oil
Herb Gravy:
• 250ml vegetable stock
• 1 tbsp nutritional yeast
• 1 tbsp soy sauce
• 1 tsp arrowroot powder (or cornstarch, optional for thickening)
• 1 sprig fresh thyme (or ½ tsp dried thyme)
Instructions
1. Combine Dry Ingredients: In a large mixing bowl, whisk together the vital wheat gluten, nutritional yeast, garlic powder, onion powder, sage, and thyme.
2. Mix the Wet Ingredients: In a separate bowl, whisk together the vegetable broth, soy sauce, and olive oil.
3. Form the Dough: Gradually pour the wet mixture into the dry ingredients, stirring continuously until a dough forms.
4. Knead the Dough: Knead on a clean surface for 5–7 minutes until elastic and firm.
5. Shape and Wrap: Shape into a roast, wrap tightly in aluminum foil, and seal.
6. Steam the Seitan: Steam for 60 minutes in a steamer basket, flipping halfway through.
7. Bake for a Crispy Finish: Remove foil, brush with soy sauce and olive oil, and bake at 180°C (350°F) for 20 minutes until golden.
8. Make the Gravy: Simmer all gravy ingredients in a saucepan over medium heat for 5–7 minutes, stirring occasionally. Add arrowroot or cornstarch if a thicker consistency is desired.
High-Protein Mashed Cauliflower and White Beans (Serves 6)

Ingredients
• 1 large cauliflower (600g), chopped into florets
• 1 can (400g) cannellini beans, drained and rinsed
• 2 cloves garlic, minced
• 2 tbsp nutritional yeast
• 2 tbsp unsweetened almond milk
• 1 tsp olive oil (optional)
• Salt and pepper to taste
Instructions
1. Steam the Cauliflower: Steam florets for 10–12 minutes until tender.
2. Sauté Garlic: Sauté minced garlic in a pan until fragrant.
3. Blend Ingredients: Combine cauliflower, beans, garlic, nutritional yeast, almond milk, and olive oil in a blender or food processor.
4. Season: Blend until smooth. Add salt and pepper to taste.
Garlic-Roasted Green Beans and Mushrooms (Serves 6)

Ingredients
• 300g green beans, trimmed
• 200g button mushrooms, halved
• 2 cloves garlic, minced
• 1 tsp olive oil
• Salt and pepper to taste
Instructions
1. Preheat Oven: Preheat oven to 200°C (400°F).
2. Prepare Veggies: Toss green beans and mushrooms with olive oil, garlic, salt, and pepper.
3. Roast: Spread on a baking sheet and roast for 15–20 minutes, flipping halfway through.
Cinnamon-Glazed Carrots (Serves 6)

Ingredients
• 4 large carrots (600g), sliced into thin rounds
• 1 tbsp maple syrup (or date syrup)
• ½ tsp cinnamon
• 1 tsp olive oil (optional)
Instructions
1. Steam the Carrots: Steam sliced carrots for 8–10 minutes.
2. Make Glaze: Warm maple syrup and cinnamon in a small saucepan over low heat.
3. Coat Carrots: Toss steamed carrots in the glaze until evenly coated.
High-Protein Chocolate Mousse (Serves 6)

Ingredients
• 300g silken tofu
• 2 tbsp unsweetened cocoa powder
• 2 tbsp maple syrup (or monk fruit)
• 1 tsp vanilla extract
• 50g dark chocolate (melted)
Instructions
1. Prepare Tofu: Drain and pat tofu dry.
2. Blend Ingredients: Blend tofu, cocoa powder, sweetener, vanilla, and melted chocolate until smooth.
3. Chill: Refrigerate for 1 hour before serving.
Final Tips for a Festive Feast
1. Prep in Advance: Steam the seitan and prepare the mousse a day ahead.
2. Customisable Options: Swap the seitan with a lentil loaf for a gluten-free main dish.
3. Presentation: Garnish dishes with fresh herbs or festive touches like pomegranate seeds for an extra pop of color.
4. Pairing Suggestions: Serve with sparkling water infused with cranberries and rosemary.
5. Leftovers: Store in airtight containers for up to 3 days for easy post-holiday meals.
Celebrate Guilt-Free
With this cruelty-free, macro-friendly vegan Christmas feast, you can celebrate the season with kindness and nutrition in perfect harmony. This feast doesn’t just taste good—it’s a statement of love, compassion, and care.
Wishing you and your loved ones a joyful and compassionate holiday season filled with love, laughter, and delicious food.
I’d love to see your creations! Let me know in the comments which dish you’re most excited to try, and don’t forget to tag me on social media with #TransformWithVenus. Let’s inspire others to make this Christmas truly special.

Sugar-Free Homemade Ketchup That Tastes Just Like Heinz!
Craving that classic Heinz ketchup taste without all the added sugar? Discover my easy, homemade sugar-free ketchup recipe—rich, tangy, and guilt-free! Click to learn how to make this healthier twist on a household favourite.
Ketchup is a household favorite—whether it’s paired with crispy fries, slathered on burgers, or used as a tangy dipping sauce. But did you know that most store-bought ketchups are loaded with sugar? A single tablespoon can contain up to 4g of sugar! For those of us aiming to stay healthy, that can add up quickly.
That’s why I decided to create a sugar-free version that tastes just as good as Heinz but is completely guilt-free. This homemade ketchup is naturally sweetened, free of preservatives, and just as thick, tangy, and rich as the original. Plus, it’s incredibly simple to make.
Why Make Your Own Ketchup?
Making your own ketchup isn’t just about cutting out sugar—it’s about taking control of what you’re putting into your body. Here are some reasons to give this recipe a try:
• No Added Sugar:
Sweetened with natural, low-calorie alternatives like monk fruit or erythritol, making it perfect for low-carb, keto, or sugar-conscious diets.
• Preservative-Free:
Unlike store-bought condiments, this recipe contains no artificial ingredients.
• Customizable Flavor:
Adjust the sweetness, tanginess, or spice level to suit your taste.
• Healthier for All:
A better option for kids, fitness enthusiasts, or anyone looking for healthier condiment choices.
How Does This Compare to Heinz?
The secret to mimicking Heinz ketchup lies in balancing sweet, tangy, and savory flavors. This recipe includes a touch of allspice and ground cloves, two key spices that give Heinz its unique depth. Combined with tomato paste, vinegar, and natural sweeteners, it’s hard to tell this isn’t the real thing!
Homemade Sugar-Free Ketchup Recipe
Ingredients
• 170g (6 ounces) unsweetened tomato paste (from a jar or tube)
• 1/2 cup water (adjust for desired consistency)
• 3 tbsp apple cider vinegar (or white vinegar for a sharper tang)
• 1 tbsp lemon juice
• 1 tsp garlic powder
• 1 tsp onion powder
• 1/2 tsp salt (or to taste)
• 1/4 tsp allspice
• 1/8 tsp ground cloves (optional, for a subtle Heinz-like touch)
• 1/4 tsp smoked paprika (optional, for depth)
• 2-3 tbsp erythritol, monk fruit sweetener, or stevia (adjust for sweetness)
Instructions
1. Mix Ingredients:
In a medium saucepan, whisk together the tomato paste, water, vinegar, and lemon juice until smooth.
2. Add Spices:
Stir in garlic powder, onion powder, salt, allspice, and cloves. Adjust the seasoning to taste.
3. Sweeten It:
Add your chosen sweetener gradually, tasting as you go to balance the sweetness and tanginess.
4. Simmer:
Place the saucepan over low heat and let it simmer for 10-15 minutes, stirring occasionally. This step melds the flavors beautifully.
5. Perfect the Texture:
If the ketchup is too thick, add water one tablespoon at a time until it reaches your desired consistency.
6. Cool and Store:
Let the ketchup cool completely before transferring it to a sterilized jar or bottle. Store in the fridge for up to 3 weeks.
Nutritional Information (Per Tablespoon)
Here’s the approximate breakdown based on the recipe:
• Calories: 5
• Protein: 0.2g
• Fat: 0g
• Carbohydrates: 1g
• Sugars: 0g
• Fiber: 0.3g
• Sodium: 100mg (adjustable)
Micronutrients & Antioxidants:
• Vitamin C:
Found in tomato paste and lemon juice, supports immune health.
• Lycopene:
A powerful antioxidant in tomatoes that may help protect against heart disease and certain cancers.
• Potassium:
Helps regulate fluid balance and muscle contractions.
Why Bother Making Ketchup from Scratch?
Now, I know what you might be thinking: why bother making ketchup from scratch when it’s so easy to grab a bottle off the shelf? And isn’t homemade more expensive?
Sure, a bottle of Heinz might seem quicker, easier, and cheaper at first glance. But let’s look beyond convenience and cost to what truly matters:
• Health Benefits:
Homemade ketchup gives you control over every ingredient, eliminating added sugars, artificial flavors, and preservatives. You’re feeding your body real, wholesome food—something you can’t put a price on.
• Long-Term Rewards:
Prioritizing unprocessed, homemade foods can lead to better health, reducing medical costs and improving your quality of life in the long run.
• Taste and Customization:
This recipe replicates the flavor of Heinz while allowing you to tweak sweetness, tanginess, or spice levels to your preference.
• Connection to Food:
Making your own ketchup reconnects you with what you eat, offering a sense of accomplishment no store-bought bottle can match.
Tips for the Perfect Ketchup
• Tangier Flavor:
Add more vinegar for an extra zing.
• Smoother Texture:
Blend the ketchup with an immersion blender for a velvety finish.
• Spicy Kick:
Add a pinch of chili powder or cayenne for some heat.
• Pair It Up:
Pair this ketchup with my Black Bean Burgers or drizzle it over my sweet potato wedges.
Why Natural Sweeteners Are Better
Unlike refined sugar, sweeteners like monk fruit or erythritol have minimal impact on blood sugar levels and provide the same sweetness without the calories. This makes them a great choice for anyone watching their sugar intake or trying to avoid spikes in blood glucose.
Storage and Usage
• Storage:
Keep this ketchup in an airtight container in the fridge. It lasts up to 3 weeks!
• Freezing:
Freeze in small portions and thaw as needed.
• Pairings:
Use with my sweet potato wedges, burgers, tofu nuggets, or even stirred into a vegan chili for added flavor.
Share Your Creations!
I’d love to see how you use this homemade ketchup in your meals. Share your creations 🍽️🪄on social media and tag me so I can feature your dishes! ❤️

How Plant-Based Diets Can Help Reduce Sugar Cravings: A Natural Solution
Struggling with sugar cravings during the festive season? Discover how a plant-based diet can help you resist holiday temptations, balance your blood sugar, and stay energized. Learn the science behind sugar cravings, practical tips to curb them, and delicious recipes to keep you on track. Feel great and glow into the New Year!
The festive season is a time of joy, celebration, and… endless sweet temptations. From chocolates and cookies to cakes and sugary drinks, resisting sugar cravings during Christmas and New Year can feel like an impossible task. But consuming too much sugar isn’t just a matter of weight gain—it can also lead to energy crashes, mood swings, and premature ageing.
What if you could naturally curb these cravings without relying on sheer willpower? A plant-based diet, rich in whole, nutrient-dense foods, offers a powerful solution. By nourishing your body and balancing your blood sugar, it can help you resist those holiday sweets and emerge healthier and energised into the New Year.
In this blog, we’ll explore why we crave sugar, how plant-based foods can help, and practical strategies to stay on track this holiday season.
“Let food be thy medicine, and medicine be thy food.”
Why Do We Crave Sugar?
Sugar cravings are more than just a desire for sweetness—they’re driven by complex physiological and psychological factors. Here’s why they occur:
Dopamine and the Brain’s Reward System
Eating sugar triggers the release of dopamine, the brain’s “feel-good” neurotransmitter. This creates a temporary sense of pleasure, but the effect is short-lived. The more sugar you eat, the more your brain craves it to maintain that reward cycle.
Blood Sugar Spikes and Crashes
Refined sugars cause a rapid spike in blood sugar, followed by a sharp drop. These fluctuations leave you feeling tired, hungry, and craving more sugar to regain energy.
Nutrient Deficiencies
A lack of certain nutrients, such as magnesium or chromium, can amplify sugar cravings. These minerals play a key role in stabilising blood sugar and supporting energy metabolism.
Emotional and Stress Triggers
The holidays can bring stress, fatigue, or emotional eating. Sugar often becomes a “comfort food” to deal with these emotions, reinforcing cravings.
How Plant-Based Diets Address Sugar Cravings
A plant-based diet focuses on whole, unprocessed foods like fruits, vegetables, legumes, nuts, and seeds. Here’s how it works to naturally reduce sugar cravings:
Stabilizing Blood Sugar
Fiber-rich foods such as oats, beans, and vegetables slow down sugar absorption, preventing the blood sugar crashes that drive cravings. Pairing fiber with healthy fats and plant-based proteins ensures steady energy levels throughout the day.
Providing Nutrient Density
Many plant-based foods are rich in magnesium, chromium, and B vitamins, which regulate sugar metabolism and reduce cravings. For example, leafy greens, nuts, and whole grains help balance blood sugar.
Supporting Gut Health
A healthy gut microbiome influences cravings. Prebiotic-rich foods like tempeh, bananas, garlic, and onions feed beneficial gut bacteria, which play a role in reducing the desire for sugary foods.
Natural Sweetness
Fruits like dates, bananas, and sweet potatoes provide a satisfying natural sweetness without the blood sugar spikes of refined sugar. They’re perfect for healthier desserts or snacks.
Key Foods to Curb Sugar Cravings on a Plant-Based Diet
Here are some plant-based foods that work wonders for controlling sugar cravings, along with how they help:
High-Fibre Foods
Examples: Lentils, beans, oats, chia seeds, and broccoli.
Why They Work: Fibre slows sugar absorption and promotes fullness, reducing hunger-driven cravings.
Healthy Fats
Examples: Avocado, nuts (almonds, walnuts), seeds (chia, flax), and coconut.
Why They Work: Fats stabilise blood sugar and provide long-lasting energy.
Plant-Based Proteins
Examples: Quinoa, tofu, tempeh, chickpeas, and edamame.
Why They Work: Protein prevents energy crashes by keeping blood sugar stable.
Naturally Sweet Options
Examples: Dates, berries, sweet potatoes, and roasted carrots.
Why They Work: These foods satisfy a sweet tooth while delivering fibre and nutrients.
Lifestyle Tips to Support Sugar Craving Reduction
Beyond diet, your lifestyle plays a significant role in managing cravings. Here are some simple strategies:
Stay Hydrated
Dehydration can mimic sugar cravings. Drink plenty of water throughout the day, and try herbal teas like cinnamon or ginger, which naturally curb sugar cravings.
Practice Mindful Eating
Slow down and savor your meals. Mindful eating regulates hunger hormones and reduces the impulse to snack on sugary treats.
Balance Your Meals
Incorporate all macronutrients (fiber, protein, and healthy fats) into every meal to keep energy levels steady.
Recipes
Here are some easy plant-based festive recipes to help you curb sugar cravings this holiday season:
Chia Pudding with Spiced Berries

A creamy, fibre-rich pudding with a touch of sweetness and warming spices, perfect for breakfast or a snack. This recipe offers sugar-free alternatives to suit your health and anti-ageing goals.
Ingredients:
3 tbsp chia seeds
1 cup almond milk
1 tbsp maple syrup (optional) or see low-glycemic alternatives below
1/2 tsp cinnamon
1/2 cup mixed berries
Instructions:
In a bowl, combine chia seeds, almond milk, cinnamon, and your choice of sweetener (if using). Stir well.
Let the mixture sit for 10–15 minutes, stirring occasionally, until the chia seeds form a pudding-like consistency.
Top with mixed berries and enjoy immediately, or chill in the fridge for a refreshing treat.
Notes:
For a natural, lower glycemic option, replace maple syrup with one of the following:
Coconut Nectar: Swap 1:1 for a caramel-like sweetness and lower glycemic impact. High-quality options include Biona Organic Coconut Blossom Syrup for a richer, caramel-like flavour or The Coconut Company Organic Coconut Nectar for a lighter, more subtle Sweetness.
Monk Fruit Syrup: Use 1–2 teaspoons for a sugar-free, naturally sweet alternative.
Date Syrup: Use sparingly (1 teaspoon or less) to add depth and sweetness.
Stevia Drops (Maple Flavoured): Add 1–2 drops for a zero-calorie, sugar-free option.
These alternatives retain the rich flavour while better supporting blood sugar balance and anti-ageing goals.
Gingerbread Energy Balls

These delicious no-bake energy balls are packed with festive flavours and wholesome ingredients, making them a perfect snack for boosting energy while staying on track with your health goals. With their gingerbread spices and balanced nutrition, they’re ideal for holiday prep, post-workout fuel, or a midday pick-me-up.
Ingredients:
1/2 cup almond flour
1/4 cup dates (pitted and soaked)
1 tbsp almond butter
1/2 tsp ginger powder
1/2 tsp cinnamon
1 tbsp ground flaxseed
Instructions:
Combine all ingredients in a food processor and blend until a sticky dough forms.
Scoop out small portions and roll into bite-sized balls.
Chill in the fridge for at least 15 minutes before serving.
Notes
• Low-Glycemic Option: Replace dates with 2–3 tablespoons of unsweetened applesauce and 1–2 drops of stevia or monk fruit for sweetness. This will reduce the overall sugar content while maintaining a moist texture.
• Boosting Protein: Add 1 tablespoon of pea or almond protein powder to the mix. If the dough becomes too dry, adjust with a small splash of almond milk.
• Flavour Variations: Experiment with other spices like nutmeg or cloves for a more complex flavour profile. You can also roll the finished balls in finely chopped nuts or shredded coconut for added texture and nutrients.
These energy balls are a great way to enjoy the seasonal flavours of gingerbread while keeping your snacks nutrient-dense and balanced.
Real-Life Benefits of Reducing Sugar Cravings
Switching to a plant-based diet and reducing sugar intake can lead to remarkable health improvements:
• Energy Boost:
Many people report steady energy levels without the afternoon crash.
• Clearer Skin:
Lower sugar intake reduces inflammation, which can improve skin texture and clarity.
• Improved Mood:
Stable blood sugar supports mental clarity and emotional balance.
Conclusion
This festive season, don’t let sugar cravings derail your health goals. By embracing a plant-based diet, you can naturally curb these cravings, enjoy steady energy, and glow with vitality.
Start small by incorporating some of the tips and recipes shared in this blog. You might find that you no longer need to rely on sugary treats to feel satisfied.
Ready to give it a try? Share your favourite plant-based recipes or sugar-free holiday tips in the comments below! I’d love to hear from you.
Until my next recipe blog, stay healthy! ❤️
“Every time you eat is an opportunity to nourish your body..”

Unlocking the Secrets of Rice: Health Benefits, Beauty Perks, and Recipes to Elevate Your Plate
Not all rice is created equal! From nutrient-packed brown rice to antioxidant-rich black rice, discover the healthiest options, why soaking rice is essential, and a recipe for creamy Coconut Black Rice that’s perfect for health, beauty, and flavour lovers. Ready to transform your rice game?

A Taste of Home: A Healthy Moussaka Recipe for November
Bring the warmth of Greek comfort food to your table with this healthy twist on classic moussaka. Perfect for November, this recipe is lighter but just as satisfying, with lean turkey, roasted veggies, and a creamy almond milk béchamel.
Growing up in Cyprus, I was blessed to be part of a Greek family who adopted me as their own. With them, I experienced the warmth of Greek culture through many things, but food was always at the heart of it. One dish that holds a special place in my heart is moussaka. It’s a meal I’ve seen lovingly prepared countless times, filling the kitchen with comforting aromas and signalling the beginning of colder, cosier days.
While traditional moussaka, with its layers of rich lamb and fried eggplant, is delicious, I wanted to create a version that reflects a healthier lifestyle while preserving all the warmth and flavour. This recipe is my twist on the classic—still satisfying, but lighter and perfect for those of us who want to enjoy the heartiness of moussaka without compromising our health goals.
Why Healthy Moussaka is Perfect for November
Moussaka is the ultimate comfort food, and there’s no better time to enjoy it than in November, as the temperature drops and we start craving wholesome, warming meals. Traditionally made with layers of eggplant, minced meat, and a creamy béchamel sauce, it’s the kind of dish that feels like a warm hug, especially during the colder months.
For me, moussaka brings back memories of family gatherings, with everyone gathered around the table, savouring each bite. My version retains that same comforting essence but with a few healthy twists.
Healthier, but Just as Delicious
In this recipe, I’ve made a few key changes to keep the spirit of traditional moussaka while making it lighter and more nutritious:
• Lean Ground Turkey: By swapping lamb for lean ground turkey, this recipe is lower in calories and saturated fat, which helps reduce cholesterol levels and supports heart health. Turkey is also a great source of protein, keeping you full and energised.
• Tempeh: Similarly, for those following a plant-based or vegan lifestyle, you can easily substitute the ground turkey with Tiba Tempeh Plant-Based Mince. Tempeh is a nutrient powerhouse: not only is it a fantastic meat alternative because it has a firm texture that mimics ground meat, it’s also a complete protein, with over 20 grams of protein per 100 grams, making it an excellent choice for muscle growth and maintenance.
Additionally, tempeh is rich in probiotics, which support digestive health and may help reduce inflammation. It also enhances the absorption of minerals like calcium, magnesium, and copper, making them more bio-available to your body.
Plus, tempeh contains isoflavones, which are antioxidants that may help fight cancer and promote overall health.
• Roasted Eggplant and Zucchini: Instead of frying the eggplant and zucchini, roasting keeps their rich flavour while significantly reducing the oil and calories. Roasting vegetables also enhances their natural sweetness and nutrient retention.
• Sweet Potatoes: Adding sweet potatoes as an option boosts the dish’s fibre, vitamin A, and antioxidant content. Sweet potatoes have a lower glycemic index than white potatoes, which can help with blood sugar control.
• Lighter Béchamel with Almond Milk and Whole Wheat Flour: Using almond milk and whole wheat flour creates a creamy top layer that’s lower in calories and dairy-free. Whole wheat flour adds extra fibre and nutrients like iron and magnesium, while almond milk provides a subtly nutty taste with fewer calories than regular milk.
• Balsamic Vinegar instead of Red Wine: Balsamic vinegar brings a tangy depth to the sauce without the added sugar and calories of wine, giving the meat layer a flavourful kick without compromising on health.
These simple swaps make this low-calorie moussaka recipe just as comforting as the original while supporting your wellness goals.
A Recipe to Warm Your Soul
Here’s the recipe, so you can bring a little taste of Greek comfort food into your home this November:
Healthy Ground Turkey Moussaka Recipe
Ingredients:
For the Meat Layer:
500g lean ground turkey (or Tiba Tempeh Plant-Based Mince for a vegan option)
1 large onion, finely chopped
2 garlic cloves, minced
1 can (400g) crushed tomatoes (no added sugar)
1 tablespoon tomato paste
1 teaspoon ground cinnamon
1 teaspoon dried oregano
1 tablespoon olive oil
Optional: 1 tablespoon balsamic vinegar
Salt and pepper to taste
For the Vegetable Layer:
2 medium eggplants, sliced thinly
2 medium zucchinis, sliced thinly
1-2 medium sweet potatoes (optional), sliced thinly
Olive oil spray or 1 tablespoon olive oil to brush
For the Lighter Béchamel:
2 tablespoons whole wheat flour (or oat flour)
500ml unsweetened almond milk (or low-fat dairy milk)
1 tablespoon olive oil or butter
1 large egg
1 pinch of nutmeg
Salt and pepper to taste
Optional toppings:
Grated parmesan or low-fat cheese for a small sprinkle (optional)
Instructions:
Prepare the Vegetables:
Preheat the oven to 200°C (390°F).
Brush the eggplant, zucchini, and sweet potato slices with olive oil or spray with olive oil spray.
Lay them on a baking sheet and roast for about 20 minutes, flipping halfway through, until tender and slightly browned.
Make the Turkey Meat Sauce:
Heat 1 tablespoon of olive oil in a large pan. Add the chopped onions and cook until softened.
Add the garlic and cook for another minute until fragrant.
If using ground turkey: Add the ground turkey to the pan and cook until browned.
If using tempeh: Crumble the tempeh into the pan (break up into smaller pieces with your hands or a spoon), and cook for about 5 minutes, stirring occasionally to allow it to absorb the flavours.
Stir in the crushed tomatoes, tomato paste, cinnamon, oregano, and balsamic vinegar (if using). Simmer for 20 minutes. Season with salt and pepper to taste.
Make the Lighter Béchamel:
In a saucepan, heat olive oil or butter. Stir in the flour and cook for 2 minutes to form a roux.
Slowly whisk in the almond milk, cooking until the sauce thickens (5-7 minutes).
Remove from heat, whisk in the egg, nutmeg, salt, and pepper.
Assemble the Moussaka:
In a greased baking dish, layer half of the roasted vegetables.
Spread the turkey meat sauce evenly over the vegetables.
Add the remaining roasted vegetables on top.
Pour the béchamel over the top, spreading it evenly. Sprinkle with a little grated parmesan, if desired.
Bake:
Bake for 25-30 minutes until the top is golden and bubbly.
Let it cool for 10 minutes before serving.
Bringing a Taste of Greece to Your Table
This healthy moussaka recipe is my way of sharing the comfort and joy of Greek cooking with you. It’s perfect for a cozy November evening or a special gathering, giving you all the heartiness of a classic dish without compromising your health goals.
I hope this recipe brings a little piece of Greece into your home and warms both your body and soul. If you try it, I’d love to hear your thoughts—let me know how it turns out for you!

Oven-Baked Sweet Potato Wedges: A Tasty Side for Health, Fitness, and Radiant Skin
My favourite sweet potato wedges are a must-try! Baked to golden perfection, they’re ideal for anyone looking to enjoy a tasty, low-glycemic side that fuels workouts, supports radiant skin, and satisfies cravings. Get the recipe and more tips for health and beauty benefits!
In my last blog, I shared my recipe for a delicious, nutrient-packed Black Bean Burger with Tangy Greek Yoghurt Sauce—a perfect dish for supporting your training goals, muscle recovery, and youthful skin. When I serve these burgers, I love pairing them with a green leafy salad and my special oven-baked sweet potato wedges. These wedges are a versatile, healthy side that can be customised to your taste preferences and make a perfect accompaniment to the burger recipe.
Let’s dive into the recipe and explore the health, fitness, and beauty benefits these wedges bring to the table!
Oven-Baked Sweet Potato Wedges Recipe
Ingredients:
• 2 medium sweet potatoes
• 2 tablespoons olive oil
• 1 teaspoon salt
• 1 teaspoon pepper
• Optional seasonings:
• 1 teaspoon paprika (smoked or regular)
• 1 teaspoon garlic powder
• 1 teaspoon onion powder
• 1 teaspoon cayenne pepper (for heat)
• Fresh herbs like rosemary or thyme (optional)
Instructions:
1. Preheat the Oven: Preheat your oven to 425°F (220°C).
2. Prepare the Sweet Potatoes:
Wash and scrub the sweet potatoes thoroughly to remove any dirt.
Cut each sweet potato in half lengthwise, then slice each half into wedges (about ½ to 1 inch thick). Aim for uniform wedges for even cooking.
3. Season the Wedges:
In a large bowl, combine sweet potato wedges with olive oil, salt, pepper, and any optional seasonings. Toss until evenly coated.
4. Arrange on a Baking Sheet:
Line a baking sheet with parchment paper or lightly grease it to prevent sticking.
Spread the wedges in a single layer on the baking sheet, avoiding overcrowding to encourage roasting, not steaming.
5. Bake:
Bake for 25-30 minutes, flipping halfway through for even cooking. They should be tender inside and crispy outside.
6. Check for Doneness:
Wedges are done when they’re golden brown and easily pierced with a fork.
7. Serve:
Let them cool for a few minutes and serve with your favourite dipping sauce, like ketchup, aioli, or a yogurt-based dip.
Storage Tips
To store leftover wedges, let them cool completely, then transfer them to an airtight container. Refrigerate for up to 3 days. To reheat and maintain crispiness, place them in a preheated oven at 400°F (200°C) for about 10 minutes.
Pairing Tips
These wedges make an ideal side for various dishes, especially my Black Bean Burgers with Tangy Greek Yogurt Sauce. If you’re cooking both at the same time, consider roasting the sweet potatoes at 375°F (190°C) alongside the burgers. Just start the sweet potatoes 10 minutes earlier to ensure they cook through for perfect timing with the burgers.
Health, Fitness, and Beauty Benefits
1. Rich in Nutrients for Training and Recovery
Sweet potatoes are packed with complex carbohydrates and fibre that provide sustained energy, helping you power through workouts and avoid blood sugar spikes. They’re also a great source of potassium and magnesium, which support muscle function and aid in post-workout recovery.
2. Supports a Lean Physique
Sweet potatoes have a relatively low glycemic index compared to regular potatoes, meaning they provide slow-releasing energy. The fibre content not only helps with digestion but also promotes satiety, which can help you stay fuller for longer and potentially support weight management goals.
3. Promotes Youthful Skin and Anti-Ageing
High in beta-carotene, an antioxidant that the body converts into vitamin A, sweet potatoes play a role in skin health and repair. This nutrient supports skin cell turnover, helping maintain smooth and youthful-looking skin. Beta-carotene is also known to protect the skin from UV-induced ageing by acting as an internal sunscreen.
4. Enhances Immune Function and Overall Wellness
Sweet potatoes are an excellent source of vitamin C and antioxidants, which support the immune system and fight oxidative stress. This makes them a wonderful food for overall wellness and a proactive approach to longevity.
5. Beauty Benefits of Olive Oil and Herbs
Using olive oil in the recipe not only enhances flavour but also provides essential fatty acids that nourish the skin, keeping it soft and hydrated. Additionally, herbs like rosemary and thyme are rich in antioxidants that have been linked to anti-ageing properties, contributing further to skin health.
A Note on Cooking Temperature, AGEs and Acrylamide
If you’re interested in the science behind cooking temperatures, here’s a tip: cooking at lower temperatures can help reduce the formation of Advanced Glycation End Products (AGEs). AGEs can accelerate skin ageing, as they damage collagen and elastin fibres, leading to wrinkles and loss of skin elasticity. Roasting sweet potatoes at 375°F (190°C) instead of 425°F (220°C) helps minimise AGEs while still achieving a satisfying texture.
In addition to reducing Advanced Glycation End Products (AGEs), cooking at lower temperatures can also help minimize acrylamide formation.
Acrylamide is a compound that forms in starchy foods, like sweet potatoes, when they are cooked at high temperatures (usually above 250°F / 120°C). It has been linked to potential health risks, including neurotoxicity and possible carcinogenic effects in high amounts.
For those prioritizing anti-aging and long-term health, reducing acrylamide exposure is beneficial, as it contributes to oxidative stress, which accelerates cellular aging.
By roasting sweet potatoes at 375°F (190°C) instead of 425°F (220°C), you also reduce acrylamide formation while still achieving a deliciously tender and crispy texture—keeping your skin, body, and health radiant.
Why Use Coconut Oil at Higher Temperatures
If you choose to cook the wedges at 425°F (220°C) instead of 375°F (190°C), consider using coconut oil instead of olive oil. Olive oil, while rich in skin-nourishing antioxidants, has a lower smoke point, meaning it can begin to break down and oxidize at higher heat, which can contribute to the formation of Advanced Glycation End Products (AGEs) and reduce its health benefits. Coconut oil, with its higher smoke point and stable saturated fat structure, is more heat-resistant and less prone to oxidation. By using coconut oil at 425°F, you can achieve that golden crispness without increasing the risk of glycation, preserving the nutritional integrity of the oil and supporting your skin’s anti-aging needs.
Seasoning Variations
Feel free to customise the seasoning to match your taste or the main dish! Here are a few options:
• Basic Flavour: 1 tsp paprika, 1 tsp garlic powder, 1 tsp onion powder
• Spicy Kick: 1 tsp paprika, 1 tsp garlic powder, ½ tsp cayenne pepper
• Herb-Infused: 1 tsp dried thyme or rosemary, 1 tsp garlic powder, 1 tsp paprika
With these sweet potato wedges, you’ll enjoy a delicious, nutritious side that complements your health and fitness goals, supports skin vitality, and keeps you feeling energised.
Enjoy these with your next meal and keep glowing!

Black Bean Burgers with a Tangy Greek Yogurt Sauce: A Healthy, Antioxidant-Rich Meal for Fitness & Anti-Aging
If you’re craving a burger that’s both delicious and packed with nutrition, these black bean burgers with a tangy Greek yogurt sauce are perfect for you. Made with antioxidant-rich black beans and complete protein from breadcrumbs, these burgers are ideal for supporting muscle recovery, promoting glowing skin, and boosting brain health. Top them with a flavorful Greek yogurt sauce to add protein, probiotics, and a fresh, zesty kick.
If you’re craving a burger that’s both delicious and packed with nutrition, these black bean burgers with a tangy Greek yogurt sauce are perfect for you. Made with antioxidant-rich black beans and complete protein from breadcrumbs, these burgers are ideal for supporting muscle recovery, promoting glowing skin, and boosting brain health. Top them with a flavourful Greek yogurt sauce to add protein, probiotics, and a fresh, zesty kick.
Why Black Bean Burgers are a Powerhouse Choice
Black beans are the star ingredient here, bringing plenty of fibre, protein, and antioxidants to the table. Here’s why they’re ideal for your wellness goals:
Antioxidants for Anti-Ageing:
Black beans contain anthocyanins—powerful antioxidants that help reduce oxidative stress, which can lead to visible signs of ageing. These compounds support skin elasticity and help maintain a youthful glow.
Hyaluronic Acid Support:
Eating beans and pulses like black beans may actually help stimulate the production of hyaluronic acid (HA). HA is a natural moisturiser, helping skin retain water to stay smooth and wrinkle-free. Since our HA levels decline with age, incorporating HA-supporting foods like beans is a natural way to replenish it.
Balanced Blood Sugar for Youthful Skin:
Beans are digested slowly, promoting gradual increases in blood sugar rather than sharp spikes. This helps reduce the need for insulin, a hormone that, in excess, can contribute to skin ageing. By keeping blood sugar steady, beans not only support energy but also protect skin from signs of premature ageing.
High in Fibre for Longevity:
Black beans and other pulses are excellent sources of fibre. Studies suggest that people who consume at least 25g of fibre a day have a biological age up to three years younger than those who consume less. Fibre makes meals more satisfying, which can help manage hunger and prevent overeating.
Brain-Boosting Boron:
Black beans contain high levels of boron, a trace mineral shown to support memory and mental alertness. This burger isn’t just a treat for your body but for your brain as well.
Collagen Production and Skin Health:
Pulses like black beans are high in plant-based protein, essential for the production of collagen, the protein that keeps skin firm and resilient. As an added bonus, black beans also provide zinc, which, along with collagen and hyaluronic acid, keeps skin hydrated from deeper layers to the surface.
Complete Protein Combo:
By combining black beans with breadcrumbs, you’re creating a complete protein that includes all essential amino acids. This is great for plant-based eaters who want to ensure they’re supporting muscle growth and recovery. Pulses paired with whole grains give your body balanced nutrients for muscle support, healthy skin, and energy.
Why a Meat-Free Option Supports Health & the Planet
Choosing plant-based meals is beneficial for animal welfare, reduces environmental impact, and can support your health. Studies have linked plant-based diets to a reduced risk of chronic diseases like heart disease, diabetes, and certain cancers due to their higher levels of fibre, antioxidants, and essential nutrients. This black bean burger is a tasty way to incorporate more plant-based options into your diet while supporting wellness and fitness goals.
Recipe: Easy and Customisable Black Bean Burgers with Greek Yogurt Sauce
This black bean burger recipe is easy to make, customisable, and loaded with nutrients. The Greek yogurt sauce adds a creamy, zesty finish, bringing additional protein, probiotics, and a tangy flavour.
Black Bean Burger Ingredients:
1 can black beans, drained and rinsed (or about 1.5 cups cooked black beans)
1/2 cup breadcrumbs (use panko or whole-wheat for extra crunch and a complete protein)
1/2 small onion, finely chopped
1 garlic clove, minced
1/2 tsp smoked paprika or chilli powder (adds a smoky flavour)
1/2 tsp cumin
Salt and pepper, to taste
1 egg (or 1 tbsp ground flaxseed + 3 tbsp water for a vegan option)
Optional add-ins: diced jalapeno, chopped cilantro, hot sauce, or 1-2 tbsp BBQ sauce
Tangy Greek Yogurt Sauce Ingredients:
1/2 cup Greek yogurt (plain, unsweetened)
1-2 tsp fresh lemon juice (for brightness)
1 garlic clove, minced (for flavour and a bit of a kick)
1-2 tsp Dijon mustard (adds a savoury tang)
1 tbsp fresh herbs (such as chopped cilantro, parsley, or dill)
Salt and pepper, to taste
Optional add-ins: 1/2 tsp smoked paprika or cumin, 1 tsp honey or maple syrup (to balance the tang)
Black Bean Burger Instructions:
1. Mash the Beans: Place the black beans in a mixing bowl and mash with a fork or potato masher, leaving some whole beans for texture.
2. Add Ingredients: Mix in the onion, garlic, spices, salt, and pepper. Stir in breadcrumbs and egg (or flax mixture).
3. Form Patties: Shape into 4-5 patties. If the mix is too wet, add more breadcrumbs; if too dry, add a bit of water or sauce.
4. Bake for Lower AGEs: Bake at 375°F (190°C) for 10-15 minutes on each side on a lined baking sheet. Baking at a moderate temperature reduces the formation of AGEs (advanced glycation end-products), which are compounds linked to inflammation and ageing.
For even greater AGE reduction, consider baking at 350°F (175°C). While this lower temperature may require a bit more baking time (about 15-20 minutes per side), it further minimizes AGE formation, aligning with anti-aging and health-focused cooking practices. This small adjustment can help preserve the nutritional benefits of your meal, making it especially suitable for those prioritizing skin health and longevity.
Greek Yogurt Sauce Instructions:
1. Mix Ingredients: In a small bowl, combine the Greek yogurt, lemon juice, garlic, Dijon mustard, herbs, and any optional spices or sweeteners. Stir until well blended.
2. Adjust Seasoning: Taste and adjust the salt, pepper, or lemon juice as needed.
3. Serve: Top your black bean burger with a dollop of this sauce or serve on the side for dipping.
Health Benefits of the Greek Yogurt Sauce:
Protein and Probiotics:
Greek yogurt is an excellent source of protein, helping with muscle recovery and keeping you fuller longer. Its probiotics support gut health and can also benefit skin health by reducing inflammation.
Fresh Herbs and Garlic:
Fresh herbs and garlic not only add flavour but also provide antioxidants and anti-inflammatory properties, making the sauce both tasty and beneficial.
Nutritional Information
Black Bean Burger (per patty, assuming 4 patties)
• Calories: ~160 kcal
• Protein: ~7g
• Carbohydrates: ~23g
• Fiber: ~7g
• Fat: ~3g
Greek Yogurt Sauce (per 2-tbsp serving)
• Calories: ~20 kcal
• Protein: ~2g
• Carbohydrates: ~1g
• Fat: ~0.5g
Tips for Customisation and Serving Suggestions
For extra flavour, add finely chopped mushrooms or roasted veggies like bell pepper or carrots into the burger mixture. For a complete meal, serve your black bean burger with a whole-grain bun or a bed of leafy greens, along with a side of oven-baked sweet potato wedges for a satisfying, antioxidant-rich addition.
Serving your burger on a whole-grain bun will help form a complete protein, thanks to the amino acid pairing between grains and legumes. However, adding mushrooms into the burger mixture is another excellent way to boost the burger’s protein profile. Since mushrooms contain all essential amino acids, they help create a complete protein when combined with black beans. For those watching carbs, mushrooms are a great choice if you prefer to skip the bun but still want a muscle-supporting protein boost.
This black bean burger with Greek yogurt sauce is more than a meal—it’s a way to support your health and wellness goals while enjoying something flavourful and fulfilling. With powerful antioxidants, fibre, complete protein, and skin-supporting nutrients, this meal will leave you feeling nourished and energised.
Enjoy!
Anti-Aging, Low GI Apple and Blackberry Crumble with Cinnamon
As we embrace the golden hues and cozy feel of autumn, it’s the perfect time to treat yourself to a dessert that not only warms you up but also supports your health goals. This Anti-Aging, Low GI Apple and Blackberry Crumble with Cinnamon is a guilt-free indulgence that combines seasonal fruits with powerful anti-aging ingredients. Packed with antioxidants, healthy fats, and low-GI sweeteners, this crumble nourishes your body while giving you that sweet autumnal comfort we all crave.
As we embrace the golden hues and cozy feel of autumn, it’s the perfect time to treat yourself to a dessert that not only warms you up but also supports your health goals. This Anti-Aging, Low GI Apple and Blackberry Crumble with Cinnamon is a guilt-free indulgence that combines seasonal fruits with powerful anti-aging ingredients. Packed with antioxidants, healthy fats, and low-GI sweeteners, this crumble nourishes your body while giving you that sweet autumnal comfort we all crave.
Why You’ll Love It:
This dessert ticks all the boxes—it’s low on the glycemic index, high in fiber, rich in antioxidants, and has a warm cinnamon aroma that makes it feel like the ultimate comfort food. Best of all, it supports your skin health and muscle recovery, making it a perfect fit for anyone focused on wellness, fitness, and anti-aging.
Ingredients:
For the Filling:
• 4 large apples (choose a lower GI variety such as Bramley or Granny Smith), peeled, cored, and sliced
• 200g fresh blackberries (packed with antioxidants to fight oxidative stress)
• 1.5 tablespoons ground cinnamon (boosts skin health, stabilizes blood sugar, and adds cozy warmth)
• 1 teaspoon vanilla extract (optional, but adds a rich depth of flavor)
• 1 tablespoon xylitol or stevia (natural low-GI sweetener to avoid blood sugar spikes)
For the Crumble Topping:
• 100g ground almonds (great source of healthy fats that promote glowing skin)
• 50g rolled oats (adds fiber for balanced blood sugar and gut health)
• 75g almond flour (low-carb, protein-rich, and helps with muscle recovery and satiety)
• 2 tablespoons coconut oil or grass-fed butter (loaded with healthy fats for skin health and sustained energy)
• 1 tablespoon chia seeds or flaxseeds (rich in omega-3s, perfect for reducing inflammation and supporting skin hydration)
• 1-2 tablespoons xylitol or stevia (to keep things naturally sweet)
• ½ teaspoon ground cinnamon (for added flavor and blood sugar control)
Instructions:
1. Preheat the oven to 190°C (170°C fan) and lightly grease a medium-sized baking dish with coconut oil or butter.
2. Prepare the fruit filling: In the baking dish, toss the apple slices and blackberries with cinnamon, vanilla extract, and xylitol or stevia. Make sure everything is evenly coated. The apples will provide a natural sweetness while the blackberries add a tart, antioxidant-rich bite.
3. Make the crumble topping: In a separate bowl, combine the ground almonds, oats, almond flour, chia or flaxseeds, xylitol or stevia, and cinnamon. Add the coconut oil or butter and mix until the texture becomes crumbly. The chia or flaxseeds help bind the mixture while adding a boost of fiber and omega-3s for overall skin health.
4. Assemble the crumble: Evenly sprinkle the crumble mixture over the fruit. The topping should be well distributed to give every bite that perfect balance of crunchy goodness.
5. Bake: Place the dish in the oven and bake for 30-35 minutes, or until the crumble topping is golden and the fruit is tender and bubbling.
6. Serve: Allow the crumble to cool slightly before serving. For an extra protein boost, top it with unsweetened Greek yogurt or a sugar-free coconut yogurt. These provide probiotics that aid digestion and keep your skin looking radiant from the inside out.
The Anti-Aging Power of This Crumble
This isn’t your average crumble. Every ingredient has been carefully selected for its health benefits, making this dessert both indulgent and nutritious:
Cinnamon – Your Blood Sugar’s Best Friend
Cinnamon isn’t just for flavor—it helps lower blood sugar levels and improves insulin sensitivity, making it ideal for those following a low-GI diet. Additionally, it’s packed with antioxidants that fight free radicals, supporting skin elasticity and promoting an overall youthful glow.
Almonds and Chia Seeds – Omega-3s and Healthy Fats for Skin Health
The ground almonds and chia seeds used in the crumble topping are fantastic sources of healthy fats and omega-3s, which are essential for skin hydration and reducing inflammation. Omega-3s are known to enhance skin elasticity and help prevent signs of aging like fine lines and wrinkles.
Blackberries – Antioxidant Powerhouses
These deep-purple berries are high in vitamins C and E, both of which are crucial for collagen production and maintaining your skin’s youthful appearance. Blackberries also contain anthocyanins, antioxidants that help protect your cells from oxidative stress.
Oats – Fiber for Balanced Blood Sugar
Oats are rich in beta-glucan, a type of soluble fiber that supports heart health and helps keep your blood sugar stable. This is especially important for those looking to maintain a lean physique and avoid the sugar spikes that can lead to unwanted fat storage and breakouts.
Seasonal Eating at Its Best
Autumn is the perfect time to embrace seasonal eating, and this crumble does just that. Apples and blackberries are at their best in October, and by using these fruits at their peak, you’re getting the most flavor and nutritional value possible. Their tartness is balanced by the natural sweetness of the xylitol or stevia, making this dessert feel indulgent without derailing your health goals.
Fitness and Wellness Focus
For those of you following a fitness or muscle-building program, this crumble is a game-changer. The combination of protein from the almond flour and healthy fats from the coconut oil and chia seeds helps support muscle repair, making this an ideal post-workout treat. It satisfies your cravings while keeping you full and aiding recovery.
Conclusion
This Anti-Aging, Low GI Apple and Blackberry Crumble with Cinnamon is more than just a dessert—it’s a way to support your body and skin health while indulging in something delicious. Whether you’re looking to maintain stable blood sugar, promote healthy skin, or support your fitness goals, this crumble has you covered. Embrace the flavors of autumn with this nourishing, low-glycemic treat that is sure to become a seasonal favorite.
Stay warm, stay glowing, and enjoy every bite!

High-Protein Chocolate Mug Cake: A Quick, Clean, and Healthy Indulgence
A quick, healthy, and indulgent High-Protein Chocolate Mug Cake that satisfies your sweet tooth while supporting muscle recovery, weight loss, and anti-ageing goals. Packed with clean, nutrient-dense ingredients like micro-filtered whey protein, this mug cake delivers around 30g of protein and is customisable for plant-based diets too!
When it comes to desserts that fit into your weight loss, training, and anti-ageing goals, quality ingredients are key. This High-Protein Chocolate Mug Cake isn’t just about convenience—it’s about using clean, nutrient-dense ingredients that nourish your body while satisfying your sweet tooth.
Why You’ll Love This Recipe:
Clean Protein Source:
I recommend using a micro-filtered whey protein powder, which is one of the purest and most easily absorbed forms of protein. It’s low in fat, cholesterol, and lactose, making it ideal for anyone with diabetes, heart concerns, or lactose sensitivity. Plus, it helps prevent skin sagging and supports joint health!
Packed with Protein:
With around 30g of protein per serving, this mug cake supports muscle recovery, weight management, and glowing skin.
Low-Carb & Zero-Sugar:
Sweetened with stevia or xylitol and made with almond flour, this cake won’t spike your blood sugar but still delivers a rich, chocolatey flavour.
100% Dark Chocolate Drops:
If you’re adding chocolate drops, opt for Montezuma's Absolute Black, 100% Cocoa, Dark Chocolate Buttons for zero sugar and a boost of antioxidants and polyphenols, which help fight oxidative stress and promote healthy skin.
Anti-Ageing Benefits:
Almond flour, dark chocolate, and high-quality whey protein provide antioxidants and nutrients that support skin health and overall vitality.
Vegan & Dairy-Free Option:
For those following a plant-based diet or avoiding dairy, you can easily substitute the whey protein for a plant-based option (see below for suggestions) and swap the egg white with a flaxseed egg (see instructions below).
Ingredients:
2 tablespoons almond flour
1 scoop (about 30g) micro-filtered chocolate protein powder (see options below)
1 tablespoon unsweetened cocoa powder
1/2 teaspoon baking powder
1 egg white (or flaxseed egg for a vegan option)
1 tablespoon unsweetened almond milk
1/2 teaspoon stevia or xylitol (adjust to taste)
Optional: a few dark chocolate drops (use Montezuma's Absolute Black, 100% Cocoa, Dark Chocolate Buttons for best results)
How to Make a Flaxseed Egg:
To replace the egg white with a vegan alternative, follow these simple steps to make a flaxseed egg:
Mix 1 tablespoon of ground flaxseed meal with 3 tablespoons of water.
Stir well and let the mixture sit for 5 minutes to thicken.
Once it reaches a gel-like consistency, it’s ready to use as a substitute for 1 egg white in the recipe.
Directions:
Mix Dry Ingredients: In a microwave-safe mug, combine the almond flour, chocolate protein powder, cocoa powder, and baking powder.
Add Wet Ingredients: Stir in the egg white (or flaxseed egg), almond milk, and your preferred sweetener until smooth.
Microwave: Place the mug in the microwave and cook on high for about 1 minute and 30 seconds. The cake should rise and be firm to the touch in the centre.
Cool & Enjoy: Let the cake cool slightly before digging in. If you’re feeling indulgent, top with a few dark chocolate drops. For maximum health benefits, I recommend using Montezuma’s 100% Dark Chocolate Buttons, which are rich in antioxidants and contain no sugar.
Why Micro-filtered Whey Protein is Best:
After the age of 35, your digestive enzymes can start to diminish, which can make it harder for your body to absorb protein effectively. This is especially true for those with type A blood, who may have more difficulty processing protein. That’s why micro-filtered whey protein is the best choice—it’s one of the purest, most easily absorbed forms of protein available. Here are some reasons to make the switch:
Easily Digested:
Micro-filtered whey proteins are gentle on your digestive system, supplying essential amino acids that support overall health.
Complete Protein:
They provide all the essential amino acids needed for building and maintaining muscle, preventing skin sagging, and supporting joint health.
Low in Fat and Cholesterol:
Micro-filtered whey is ideal for people managing diabetes, heart problems, or lactose intolerance, as it contains no lactose or starch and is very low in fat.
Plant-Based Protein Option:
For those avoiding dairy or following a plant-based diet, you can substitute the whey protein for a high-quality plant-based protein powder with zero sugar. Look for one that contains only pea protein and cocoa with no unnecessary ingredients. You can also make your own blend:
DIY Chocolate Plant Protein Powder:
1 scoop organic pea protein powder
1 tablespoon cacao powder
The Health & Beauty Benefits of Whey Protein:
Whey protein offers more than just muscle-building benefits:
Glutathione Production:
Whey protein supports the body’s production of glutathione, a powerful antioxidant that defends against oxidative stress and boosts immune function.
Rich in Amino Acids:
Whey contains all nine essential amino acids, crucial for muscle repair, skin regeneration, and healthy hair.
Supports Healthy Skin:
The antioxidants in whey combat free radicals, promoting youthful, radiant skin.
Fat Loss & Satiety:
Whey protein helps with fat loss and enhances feelings of fullness, making it an ideal choice for weight management.
This high-protein mug cake provides a delicious, clean, and nutrient-packed treat that aligns with your health, fitness, and anti-ageing goals. Whether you use a clean whey protein powder or a plant-based alternative with zero sugar, this recipe supports your body from the inside out.
Something Extra For You
If you enjoyed this recipe and want to try more healthy, flavourful dishes, check out these other options on my site:
A wholesome, veggie-packed classic.
Steamed Tempeh with Peanut-Lime Sauce (Using Monk Fruit):
A high-protein, plant-based dish with a zesty twist.
Healthy and Flavourful Chicken Recipes:
Lean, protein-rich meals perfect for body transformation goals.

Ratatouille
If you’re looking for a flavourful dish that’s not only rich in taste but also packed with vitamins, antioxidants, and anti-inflammatory benefits, this Healthy Ratatouille is a perfect choice! Whether you're meal prepping for the week or looking for a delicious way to boost your intake of nutrient-dense vegetables, this ratatouille recipe is a must-try. It’s not only a feast for your taste buds but also a powerhouse for your health.
If you’re looking for a flavourful dish that’s not only rich in taste but also packed with vitamins, antioxidants, and anti-inflammatory benefits, this Healthy Ratatouille is a perfect choice! Whether you're meal prepping for the week or looking for a delicious way to boost your intake of nutrient-dense vegetables, this ratatouille recipe is a must-try. It’s not only a feast for your taste buds but also a powerhouse for your health.
Why Ratatouille?
Ratatouille isn’t just a pretty dish – it’s a nutritional gem. Here’s why:
Eggplant: High in antioxidants, especially nasunin, which helps protect your cells.
Bell peppers: Rich in vitamin C, beta-carotene, and vitamin A, these add a colourful and nutrient-packed punch.
Zucchini: Loaded with fibre, vitamins C and B6, and low in calories.
Tomatoes: A great source of lycopene, an antioxidant known for supporting heart health and skin health.
Garlic: Known for its immune-boosting and anti-inflammatory properties.
Olive oil: Packed with heart-healthy fats and antioxidants, making it a staple in Mediterranean diets for a reason.
This dish is perfect for skin health, immune support, and anti-ageing, and it’s completely plant-based, low in fat, and high in flavour.
The Recipe
Ingredients:
1 large eggplant
2 medium zucchinis
1 large red bell pepper
1 large yellow bell pepper
1 large red onion
4 ripe tomatoes
3-4 garlic cloves
Fresh thyme, rosemary, and basil
2 tablespoons extra virgin olive oil
Sea salt and black pepper to taste
1-2 teaspoons balsamic vinegar (optional)
Optional garnish: Fresh basil or parsley
Instructions:
Prep the Veggies:
Begin by rinsing and slicing the eggplant, zucchini, bell peppers, tomatoes, and onion into thin rounds or cubes for an even cook. Mince the garlic. Sprinkle the eggplant with a bit of salt and let it sit for 10 minutes to draw out any bitterness. Then, rinse and pat dry.Sauté the Aromatics:
Heat 1 tablespoon of olive oil in a large pan over medium heat. Add the onion and garlic, sautéing until they soften and become fragrant (about 3-5 minutes).Tip for Busy Readers and Those Counting Calories:
If you're using frozen chopped red onions and garlic, you can skip the sautéing step, saving time and calories. Frozen onions and garlic retain their nutrients, and by omitting the extra olive oil, you reduce the total fat content of the dish!Layer and Season:
In a large oven-safe dish, layer the vegetables over the sautéed (or frozen) onion and garlic. Alternate the slices for a beautiful presentation. Drizzle the remaining olive oil on top, sprinkle with fresh herbs, sea salt, and black pepper. Add balsamic vinegar if you enjoy a hint of sweetness.Bake:
Cover the dish with foil and bake at 375°F (190°C) for 40–50 minutes, uncovering for the last 10 minutes to allow the top to roast slightly. The vegetables should be tender but still have a bit of structure.Garnish and Serve:
Once baked, garnish with fresh basil or parsley. This ratatouille can be served as a standalone dish or paired with quinoa, lentils, or even whole-grain pasta for a complete meal.
Cooking Tips to Minimise AGEs
During cooking, especially at high temperatures, a process called the Maillard reaction occurs, which creates Advanced Glycation End-products (AGEs). These compounds, formed when proteins and sugars interact, can contribute to inflammation and accelerate aging when consumed in high amounts. Baking ratatouille at a lower temperature, like 175°C (347°F), helps reduce AGEs, making this dish even healthier!
If you prefer cooking at higher temperatures, consider using coconut oil instead of olive oil, as it has a higher smoke point. This means it remains stable and less likely to break down into harmful compounds at higher heats, while still adding a delicious, slightly tropical flavour to your ratatouille.
Nutritional Information per Serving:
Serving Size: About 1 cup (depending on how thinly the veggies are sliced)
Servings: Approximately 6
Calories: 120 per serving (this includes the use of olive oil for sautéing; without sautéing, it’s around 100 calories)
Protein: 2g
Fat: 6g (with olive oil; without sautéing, about 4g)
Carbohydrates: 14g
Fiber: 4g
For calorie-conscious readers: If you use frozen onions and garlic and omit the sautéing step, you can reduce the fat by 2g per serving, making this dish even lighter without sacrificing flavour!
Dirty Dozen: Choose Organic for Healthier Choices
For those of you who are mindful of pesticide exposure, it’s important to note that some of the ingredients in this ratatouille are part of the Dirty Dozen list, meaning they tend to have higher levels of pesticide residue when grown conventionally. To minimise your exposure, consider buying these ingredients organic:
Bell peppers: Bell peppers often rank high on the Dirty Dozen list due to their thin skin, which makes it easier for pesticides to penetrate.
Tomatoes: Tomatoes are another entry on the Dirty Dozen list, and their delicate skin also makes them more susceptible to pesticide residues.
The other ingredients, such as eggplant, zucchini, onions, and garlic, are generally lower in pesticide residues and can be bought conventionally without much concern. If you're prioritising organic produce, choosing organic bell peppers and tomatoes for this recipe can make a meaningful difference in reducing your exposure to harmful chemicals while still enjoying a nutritious and delicious meal.
How to Use Ratatouille
One of the best things about this ratatouille is its versatility! Here are some ways to enjoy it:
Meal prep: Make a batch ahead of time and enjoy it throughout the week. It freezes well, so you can store leftovers in individual portions for an easy grab-and-go meal.
Pasta sauce: Blend it for a smooth, rich pasta sauce or leave it chunky and toss it with your favourite whole-grain or legume-based pasta.
Protein pairing: Add some grilled chicken, turkey, or a plant-based protein like tofu or lentils to make it even more filling.
Health Benefits
Each ingredient in this ratatouille brings its own set of health benefits:
Eggplant (is high in fibre and antioxidants, promoting healthy digestion and reducing oxidative stress.
Bell peppers are loaded with vitamins A and C, boosting immune function and supporting skin health.
Zucchini adds a low-calorie source of fibre, helping to regulate digestion and blood sugar levels.
Tomatoes are rich in lycopene, which is known for its heart-health and anti-inflammatory benefits.
Garlic has been shown to support heart health and strengthen the immune system.
Olive oil is an excellent source of healthy fats that support brain function and cardiovascular health.
Why It’s Great for Fitness Enthusiasts
For those of you training or focused on a healthy lifestyle, this ratatouille is a fantastic addition to your meal plan:
Low-calorie: Perfect for those looking to maintain or lose weight without sacrificing nutrition.
Rich in fibre: Keeps you feeling full longer and helps regulate blood sugar.
Packed with antioxidants: Supports recovery and reduces inflammation, making it an excellent choice for post-workout meals or recovery days.
Final Thoughts
This ratatouille is not only easy to make but incredibly nourishing. With its rich blend of vegetables, heart-healthy olive oil, and herbs, it’s perfect for meal prepping or as a nutrient-dense addition to any meal. Whether you serve it as a main dish, side, or even use it as a pasta sauce, it will leave you satisfied and full of vitamins, antioxidants, and flavour.
By making smart choices like opting for organic versions of the Dirty Dozen ingredients, you’re ensuring that your meals are as clean and healthy as possible. Enjoy this ratatouille knowing you're fuelling your body with wholesome, nourishing foods!